
Table of Contents
- Why Luxury Bathroom Tiles Need Special Care
- Prepare Your Tiles: Remove Loose Dust and Debris First
- Choosing the Best Cleaner for Bathroom Tiles
- Step-by-Step: Cleaning Bathroom and Shower Wall Tiles
- How to Clean Natural Stone Bathroom Tiles Without Damage
- How to Remove Soap Scum From Bathroom Tiles
- How to Clean Bathroom Tile Grout and Maintain Sealants
- Drying and Finishing: Prevent Water Spots and Restore Shine
- Frequently Asked Questions
Last Updated: October 17, 2026
Why Luxury Bathroom Tiles Need Special Care
Clean luxury bathroom tiles demand a different approach than standard ceramic or porcelain. Natural stone, premium finishes, and specialty materials respond poorly to harsh chemicals and aggressive scrubbing.
Marble, travertine, limestone, and other natural stone tiles are porous and vulnerable to acidic cleaners. Grout lines and sealants can deteriorate when exposed to bleach or ammonia. Even porcelain and ceramic tiles with luxury glazes lose their shine under abrasive techniques.
The good news: cleaning luxury bathroom tiles properly is straightforward once you know what to avoid. This guide covers exactly how to care for your tiles so they stay beautiful for years.
Prepare Your Tiles: Remove Loose Dust and Debris First
Start by removing surface debris before applying any cleaner. Dust and loose particles can scratch tile surfaces when you wipe, especially on polished finishes.
Here’s what to do:
- Sweep or vacuum the tile floor with a soft-bristle brush attachment
- Use a dry microfiber cloth to wipe wall tiles and remove dust
- Pay special attention to grout lines where debris collects
- For shower tiles, make sure the area is dry before starting
This step takes just a few minutes but prevents damage. When you apply cleaner to a dusty surface, particles become embedded in the solution and act like sandpaper against your tiles.
Use a handheld vacuum with a brush attachment rather than a broom, it captures dust more effectively and won’t scatter particles across wet surfaces later.
Choosing the Best Cleaner for Bathroom Tiles
The cleaner you select makes all the difference between a brilliant shine and a dull, damaged finish. Not all bathroom tile cleaners are created equal, and luxury materials require pH-neutral formulas.
What to use:
- pH-neutral cleaners specifically labeled for bathroom tiles
- Mild dish soap diluted in warm water (a simple, effective option)
- Commercial tile cleaners designed for natural stone (for marble, travertine, limestone)
- Distilled water for rinsing (tap water can leave mineral deposits)
What to avoid:
- Bleach or ammonia-based cleaners (they etch natural stone and damage grout)
- Vinegar on natural stone (acidic and causes permanent damage)
- Abrasive powder cleaners (they scratch glazes and finishes)
- Oil-based or wax products (they leave buildup on luxury finishes)
For natural stone tiles, check the manufacturer’s care guide. Some premium stone requires specialized sealers and cleaners. When in doubt, test any new cleaner on a hidden corner first to confirm it won’t discolor or damage the finish.
Never mix cleaners. Combining bleach with ammonia creates toxic fumes. Even mixing different commercial cleaners can create harmful chemical reactions.
Step-by-Step: Cleaning Bathroom and Shower Wall Tiles
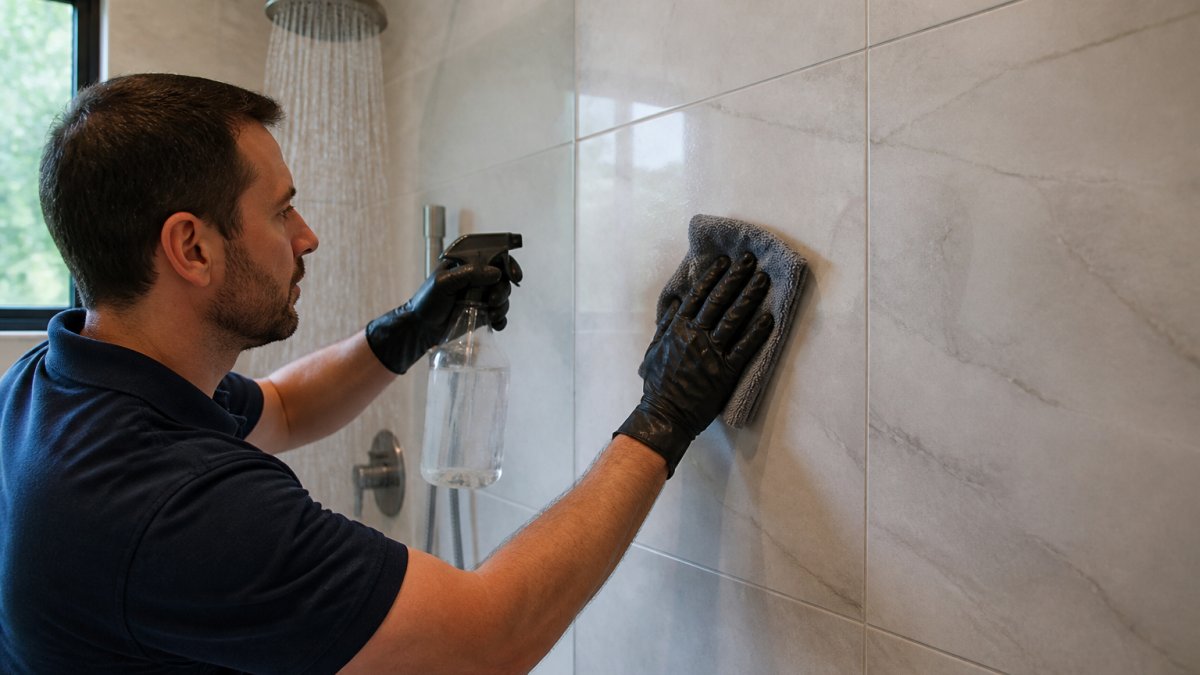
Wall tiles in bathrooms and showers accumulate soap scum, water spots, and mineral buildup. This section walks you through the proper cleaning process.
Step 1: Prepare your cleaning solution
Mix warm water with a few drops of mild dish soap in a spray bottle. For stubborn buildup, use a commercial pH-neutral tile cleaner according to package directions.
Step 2: Spray and let sit
Apply the cleaning solution to wall tiles, starting from the top so liquid runs downward. Let it sit for 2-3 minutes to break down soap scum and grime.
Step 3: Scrub gently
Use a soft-bristle brush or microfiber cloth to scrub in circular motions. For shower tiles with heavy soap buildup, apply slightly more pressure but avoid aggressive scrubbing that can scratch the glaze.
Step 4: Rinse thoroughly
Rinse with clean, warm water using a spray bottle or handheld showerhead. Make sure all cleaner residue is gone, leftover solution leaves streaks and buildup. Rinse again if needed.
Step 5: Dry immediately
Use a clean, dry microfiber cloth to wipe tiles and prevent water spots. This is especially important in hard-water areas where mineral deposits can build up quickly.
The key to wall tile cleaning is gentle pressure and thorough rinsing. Luxury tiles look best when cleaned regularly with mild solutions rather than aggressively scrubbed once a month.
How to Clean Natural Stone Bathroom Tiles Without Damage
Natural stone is where luxury bathroom tile care most often goes wrong. Marble, travertine, limestone, onyx, and slate are all softer and more porous than porcelain or ceramic, and each responds differently to cleaners, water, and abrasion.
Material-by-material cleaner compatibility
- Marble: pH-neutral stone cleaner only. Avoid all acids, bleach, ammonia, and abrasive powders. Wipe up spills, wine, citrus, shampoo, within minutes. Use a soft microfiber cloth, never a brush on polished surfaces.
- Travertine: pH-neutral cleaner. Travertine has natural pits and voids; use a soft cloth rather than a brush so fibers don’t catch and tear the surface. Fill voids only with a color-matched stone filler, not grout.
- Limestone: pH-neutral cleaner, soft cloth. Limestone is highly absorbent and stains easily; blot spills rather than wiping them across the surface.
- Slate: pH-neutral cleaner. Slate is acid-tolerant compared with marble but can flake at the edges; avoid stiff brushes and heavy scrubbing.
- Onyx: the most delicate of the group. pH-neutral cleaner, soft cloth, minimal water. Onyx is translucent and soft, and even mild abrasives can dull it.
Water and dwell time
Prolonged water contact is a problem for all porous stone. Marble and limestone absorb moisture, which can lead to discoloration, efflorescence, and mold in grout lines.
Sealer check before you clean
Before cleaning, confirm the stone is still sealed. Place a few drops of water on an inconspicuous tile. If the water beads, the sealer is intact. If it soaks in within a minute or two, the stone needs resealing before it is cleaned with any liquid.
Testing before full cleaning
Always test a new cleaner on a hidden corner or an off-cut tile first. Apply the solution, let it sit for the full dwell time you intend to use, then check for dulling, discoloration, or etching before cleaning the whole surface.
Never use vinegar, lemon juice, or any descaler on marble, travertine, limestone, or onyx. The acid reacts with calcium carbonate in the stone and etches the surface permanently.
Keep a spray bottle of pH-neutral stone cleaner and a stack of clean microfiber cloths in the bathroom. The easier the correct method is to reach, the less likely anyone is to grab a general-purpose bathroom spray.
How to Remove Soap Scum From Bathroom Tiles
Soap scum builds up on bathroom and shower tiles over time, creating a dull, cloudy appearance. This mineral and soap residue is stubborn but removable with the right approach.
For light soap scum:
- Mix equal parts white vinegar and water (but only on ceramic or porcelain, never natural stone)
- Spray on tiles and let sit for 5 minutes
- Scrub with a soft-bristle brush
- Rinse thoroughly with clean water
For heavy buildup:
- Use a commercial tile cleaner designed to dissolve soap scum
- Apply according to package directions
- Let it sit longer (10-15 minutes) to break down stubborn deposits
- Scrub gently with a soft brush
- Rinse multiple times to remove all residue
On natural stone tiles:
- Skip vinegar entirely, use only pH-neutral cleaners
- Apply the cleaner and let it sit for 3-5 minutes
- Wipe with a soft cloth rather than scrubbing
- Rinse with distilled water to prevent mineral spots
Prevention is easier than removal. After each shower, squeegee water off tiles and wipe the surface with a dry cloth. This simple habit prevents soap scum from building up in the first place.
How to Clean Bathroom Tile Grout and Maintain Sealants
Grout is the weakest point in any luxury tile installation. It traps soap, body oils, shampoo residue, and hard-water minerals, and once it is stained or cracked, water reaches the substrate behind the tile. The right routine depends on which grout you have and whether the stone or grout is sealed.
Cement grout versus epoxy grout
- Cement grout is porous and must be sealed. Clean with a pH-neutral cleaner and a soft-bristle grout brush, working along the lines rather than across them. Rinse thoroughly and dry. For stubborn stains, a baking-soda paste left for 5-10 minutes is safe on most cement grout, but rinse it fully, baking soda is mildly alkaline and can dull some stone if left in contact.
- Epoxy grout is non-porous and does not need sealing. It is more stain-resistant but can yellow under harsh bleach or abrasive scrubbing. Use pH-neutral cleaner and a soft brush; avoid abrasive pads and strong acids, which dull the epoxy surface.
- Sealed stone edges next to grout need the same pH-neutral approach as the stone itself. Never use a grout brush on polished marble or limestone edges, use a soft toothbrush instead.
How to check whether resealing is needed
The water-bead test is the simplest field check. Drip water onto a grout line in an inconspicuous area. If it beads and sits on the surface, the sealer is working. If it darkens the grout and soaks in within a minute or two, it is time to reseal.
Resealing procedure
- Clean the grout thoroughly and let it dry for at least 24 hours, sealer will not bond to damp grout.
- Apply a penetrating sealer with a small foam brush or applicator bottle, working it into the lines.
- Wipe excess sealer from the tile face within 10-15 minutes before it cures.
- Allow 24-48 hours cure time before the area is used, following the product’s directions.
What not to do
Never use bleach on grout that has a penetrating sealer, bleach breaks down the sealer and can leave the grout more vulnerable than before. Avoid steam cleaners on epoxy grout, which can soften it, and avoid acid-based grout cleaners on any cement grout adjacent to natural stone.
Match the grout routine to the grout type, test for sealer with a water drop, and reseal on a schedule rather than waiting for staining to appear. Grout care is the cheapest way to protect a luxury tile installation.
Drying and Finishing: Prevent Water Spots and Restore Shine
How you finish the cleaning process determines whether your tiles look streak-free and glossy or dull and spotted.
Proper drying technique:
- Use a clean, lint-free microfiber cloth
- Wipe tiles in one direction for a uniform appearance
- Pay special attention to grout lines where water pools
- Dry shower tiles immediately after cleaning to prevent water spots
Preventing water spots:
Hard water contains minerals that leave visible deposits on tile. In areas with hard water, use distilled water for the final rinse. This removes mineral-laden tap water and prevents spots.
Restoring shine:
Luxury tiles regain their natural shine once they’re clean and dry. Avoid commercial tile polish or wax products, these leave buildup and make tiles slippery. A properly cleaned and dried surface has its own natural luster.
For tiles that look dull even after cleaning, the issue is usually mineral buildup or residual cleaner. Rinse again with distilled water and dry thoroughly.
Keeping luxury bathroom tiles clean doesn’t require expensive products or complex techniques. The right approach protects your investment and keeps tiles looking beautiful. Contact us for a free consultation about your bathroom renovation.
Frequently Asked Questions
Can you use vinegar on luxury bathroom tiles?
Vinegar is acidic and can damage natural stone tiles like marble, travertine, and limestone by etching the surface. For ceramic and porcelain tiles, diluted vinegar may work occasionally, but pH-neutral cleaners are safer long-term. Always test any cleaner on a small, hidden area first. If your bathroom features natural stone, skip vinegar entirely and use a cleaner specifically formulated for that material.
What is the safest way to clean luxury bathroom tiles?
The safest approach combines three steps: vacuum or sweep to remove loose debris, use a pH-neutral cleaner or mild dish soap diluted in warm water, and wipe with a soft cloth or microfiber mop. For natural stone, choose a cleaner labeled safe for that specific material. Rinse thoroughly with clean water and dry immediately to prevent water spots. Avoid abrasive scrubbers, bleach, and ammonia, which can scratch or discolor premium finishes.
How often should bathroom tiles be cleaned?
Light cleaning (dusting and wiping) works best weekly to prevent soap scum and grime buildup. Deep cleaning with a proper cleaning solution every 2-4 weeks keeps tiles looking new and maintains their protective sealant. Bathrooms with heavy moisture or hard water may need more frequent attention. Shower tiles benefit from a quick wipe-down after each use to reduce mineral deposits and soap residue.
Can abrasive cleaners scratch glossy bathroom tiles?
Yes, abrasive cleaners and scrubbing pads can scratch glossy finishes on ceramic, porcelain, and natural stone tiles. Always use soft-bristle brushes, microfiber cloths, or non-abrasive scrubbers. For stubborn stains, increase contact time with a gentle cleaner rather than applying pressure. Luxury tiles with polished or sealed finishes are especially vulnerable to scratching, so prioritize gentle cleaning methods to preserve their shine and surface protection.
