
Table of Contents
- Why Sealing Natural Stone Bathroom Tiles Matters
- Cleaning Natural Stone Before Sealing
- Choosing the Best Stone Sealer for Bathroom Use
- Step-by-Step Stone Sealing Application Process
- How Often to Reseal Stone Shower Tile
- Common Mistakes to Avoid When Sealing Stone
- Testing and Troubleshooting Failed Applications
- Professional vs. DIY Sealing: Cost and Results
- Frequently Asked Questions
Last Updated: September 20, 2026
Why Sealing Natural Stone Bathroom Tiles Matters
Natural stone brings elegance to any bathroom, but these materials are porous. Water, soap, and stains can soak right in, which is why sealing natural stone bathroom tiles is essential. A good sealer creates a protective barrier that stops water and oils from penetrating the stone, preventing stains, moisture absorption, and deterioration.
The stakes are high in a bathroom. Constant moisture, steam, soap residue, and mineral deposits can discolor and damage unsealed stone. Sealing prevents all of this.
Proper sealing makes the difference between tiles that look new for years and tiles needing replacement within months. Sealing is straightforward; you can DIY or hire a professional.
Cleaning Natural Stone Before Sealing
You cannot seal dirty stone. Dust, soap scum, and mineral deposits block sealer bonding. Cleaning comes first.
Use a pH-neutral cleaner made for natural stone. Regular household cleaners are often too acidic and can etch surfaces.
Here’s the process:
- Mix the stone cleaner with water according to label instructions.
- Spray the tiles generously.
- Let the solution sit for 5-10 minutes.
- Scrub gently with a soft-bristled brush.
- Rinse thoroughly with clean water.
- Dry completely with a microfiber cloth.
Pay special attention to grout lines. Use an old toothbrush to scrub between tiles and rinse multiple times; any residue interferes with sealing.
For stubborn mineral deposits, use a stone-specific degreaser. Avoid vinegar, bleach, or acidic products, as they can damage stone.
After cleaning, wait at least 24 hours before sealing. The stone must be completely dry. If your bathroom is damp, open windows and run a fan to speed drying.
Use a moisture meter to check if stone is dry enough. Insert it into grout lines. If the reading is below 3%, you’re ready to seal. Most hardware stores sell these for under $20.
Choosing the Best Stone Sealer for Bathroom Use
Not all sealers work the same way. Understanding the difference helps you pick the right product for your tiles.
Penetrating vs. Topical Sealers
Penetrating sealers soak into the stone, filling pores and creating a water-resistant barrier from within while maintaining the stone’s natural look and feel.
These sealers work best for:
- Marble and limestone (softer stones)
- Shower walls and floors
- Areas where you want a natural appearance
- Porous stone types that absorb water easily
Topical sealers sit on the surface like varnish, creating a glossy protective coating against stains and water.
Topical sealers suit:
- High-traffic bathroom floors
- Areas needing maximum stain resistance
- Granite and denser stones
- Situations where extra shine is desired
For bathroom tiles, penetrating sealers are usually better. They provide water protection while letting stone breathe and hiding water spots better than topical coatings.
Check the product label for compatibility with your stone type. Travertine, marble, slate, and limestone have different absorption rates; a sealer made for marble may not protect limestone adequately.
Look for sealers labeled “hydrophobic” or “oleophobic.” Hydrophobic means water-repellent. Oleophobic means oil-repellent. Both matter in a bathroom. You want protection against moisture and soap residue.
Never use a sealer designed for outdoor stone indoors. Outdoor sealers often contain volatile organic compounds (VOCs) that are too strong for bathroom use. Indoor sealers have lower VOC levels and are safer for enclosed spaces.
Step-by-Step Stone Sealing Application Process
Sealing stone is not complicated, but it requires attention to detail. Rushing leads to uneven coverage and poor protection.
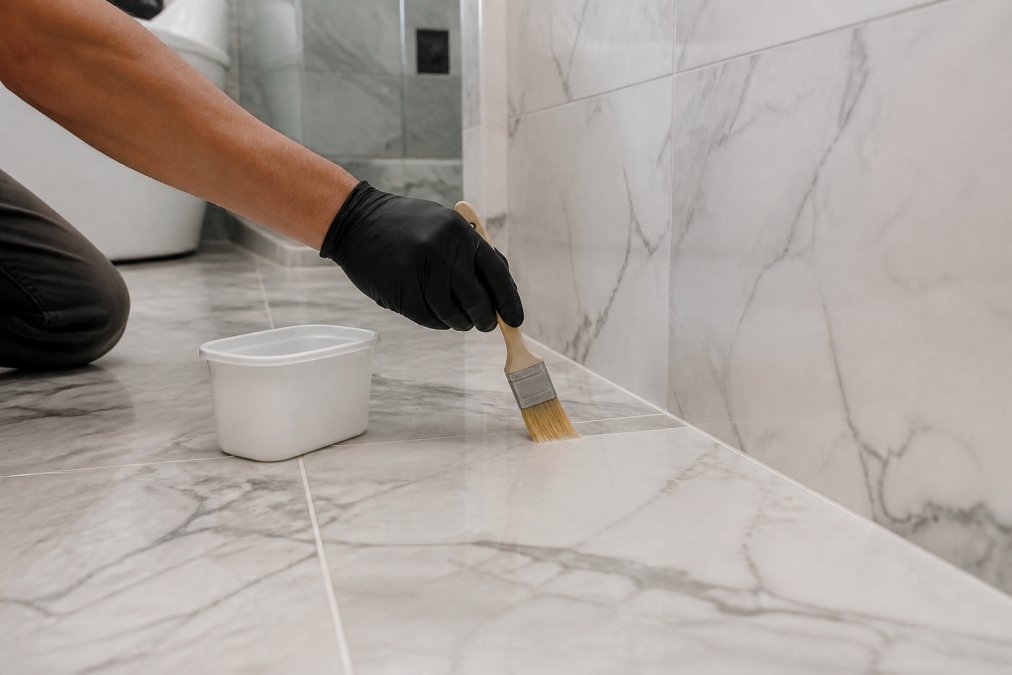
Surface Preparation and Setup
Prepare your workspace with proper ventilation. Open windows and doors, and run the exhaust fan; sealer fumes need to escape.
Gather your tools: applicator brush or microfiber cloth, small container, lint-free cloths, gloves, eye protection, drop cloth, and painter’s tape.
Tape off grout lines if you’re using a topical sealer. Penetrating sealers typically don’t require this, but it prevents accidents.
Test the sealer on a small, hidden area first. This shows you how it looks and how it behaves. Some sealers darken stone slightly; others leave no visible change. Testing prevents surprises.
Applying the Sealer
Read the product instructions carefully. Dwell time (how long the sealer sits before wiping) varies by brand, typically 5-15 minutes.
Pour a small amount of sealer into your container. Do not leave the entire bottle open, as sealer thickens with air exposure.
Apply sealer with smooth, even strokes in approximately 0.6-meter by 0.6-meter sections, overlapping slightly for consistent coverage without soaking the stone.
Watch for puddles and wipe excess away immediately; uneven application creates blotchy protection.
After dwell time, buff excess sealer with a lint-free cloth. Leftover sealer creates grout haze, so buffing is essential.
Use light pressure. Rub in circular motions. Keep buffing until the surface feels dry to the touch.
If you see grout haze forming, do not panic. You can remove it with a microfiber cloth slightly dampened with water. Rub gently until the haze disappears. This works best if caught immediately after application.
Drying and Curing Times
Drying (sealer feels dry) and curing (sealer hardens fully) are different.
Most sealers dry to the touch within 1-2 hours, but full curing takes 24-48 hours (some up to 72 hours).
Check your sealer’s label for exact curing times. Do not shower until curing is complete; water exposure breaks the seal.
Temperature and humidity affect curing. Ideal conditions are 18-24°C with moderate humidity.
Keep the bathroom dry during curing. Close windows and avoid running the shower or bath; even steam interferes with curing.
How Often to Reseal Stone Shower Tile
Sealing is not permanent. Over time, the protective barrier wears away. Water and soap gradually break down the sealer. How often you reseal depends on usage and sealer type.
Most bathroom stone needs resealing every 1-3 years, depending on usage.
Test your stone by pouring water drops on the tile. If water beads up, the sealer is working. If water soaks in and darkens the stone, resealing is needed.
Do this water absorption test twice yearly to know when protection is fading.
Penetrating sealers last longer than topical coatings, which wear faster from showers, cleaning, and foot traffic.
Resealing is faster than initial application. Most people finish a bathroom reseal in 1-2 hours.
Test your stone twice yearly with the water drop test. When water no longer beads up, plan to reseal within the month. Staying ahead of sealer breakdown keeps your tiles protected year-round.
Common Mistakes to Avoid When Sealing Stone
Small errors create big problems. Learning from others’ mistakes saves time and frustration.
Sealing wet stone. This is the most common mistake. Moisture trapped beneath the sealer causes discoloration and poor bonding. Always wait 24 hours after cleaning. Use a moisture meter if you’re unsure.
Using the wrong cleaner before sealing. Acidic cleaners etch stone and leave residue. Only use pH-neutral cleaners designed for natural stone. Dish soap leaves a film. All-purpose cleaners are too harsh.
Applying too much sealer. More sealer does not mean better protection. Excess sealer creates grout haze and sticky residue. Apply thin, even coats. One coat of penetrating sealer is usually enough.
Ignoring dwell time. Each sealer has a specific dwell time. Wiping too early means incomplete bonding. Waiting too long can cause the sealer to dry on the surface instead of penetrating. Follow the label exactly.
Not buffing excess sealer. This creates haze and reduces clarity. Buff thoroughly with a lint-free cloth. The surface should feel dry and look clear.
Exposing stone to water too soon. Curing takes 24-48 hours minimum.
Testing and Troubleshooting Failed Applications
Sometimes sealing goes wrong. Knowing how to fix problems saves money and frustration.
Professional vs. DIY Sealing: Cost and Results
Deciding whether to seal stone yourself or hire a professional depends on several factors.
Benefits of DIY:
- Lower material costs
- Control over product choice
- Flexibility in timing
- Satisfaction of doing it yourself
Drawbacks:
- Risk of uneven application
- Potential for mistakes
- No warranty or guarantee
- Time and physical effort required
Benefits of professional sealing:
- Expert application
- Warranty on work
- Faster completion
- No risk of mistakes
- Professional-grade sealers often better quality
Drawbacks:
- Higher upfront cost
- Need to schedule service
- Less control over product choice
Frequently Asked Questions
What is the best sealer for natural stone tile in a bathroom?
The best stone sealer for a bathroom depends on your stone type and desired finish. Penetrating sealers work well for porous stones like travertine and limestone, offering water and stain resistance while maintaining the stone’s natural appearance. Topical sealers create a protective coating on marble and honed surfaces. Look for sealers that provide both hydrophobic and oleophobic protection, meaning they resist water and oil-based stains. Check product labels for VOC content and ensure the sealer is specifically formulated for bathroom environments where moisture exposure is constant.
How often should you reseal natural stone bathroom tiles?
Most natural stone bathroom tiles need resealing every 1 to 3 years, depending on traffic, moisture exposure, and the sealer type used. Penetrating sealers typically last 1 to 2 years, while topical coatings may last 2 to 3 years. Test your stone’s water absorption by placing a few drops on the surface; if water beads up, the sealer is still effective. If water absorbs quickly, it’s time to reseal. High-moisture areas like shower walls may need more frequent resealing than vanity countertops.
Can you seal natural stone tiles yourself, or do you need a professional?
You can seal natural stone tiles yourself if you follow the preparation and application steps carefully. The process requires proper cleaning, correct dwell time, and attention to excess residue removal. However, mistakes during application, such as uneven coverage, over-saturation, or improper buffing, can result in streaking, haze, or failed protection. Professionals have experience with different stone types and can ensure consistent results. If you’re uncertain about stone compatibility or have a high-value installation, professional sealing reduces the risk of costly damage.
What happens if you don’t seal natural stone tiles?
Unsealed natural stone is porous and absorbs water, oils, dirt, and other liquids, leading to staining, discoloration, and moisture damage. In bathrooms, this accelerates mold and mildew growth, degrades grout, and can eventually compromise the structural integrity of the tile installation. Acidic substances like soap residue and hard water deposits etch unprotected marble and limestone. Over time, your tiles lose their natural beauty and durability. Sealing creates a moisture barrier and stain resistance that protects your investment and extends the life of your bathroom tiles.
