
Table of Contents
- Why Properly Sealing Your Shower Enclosure Matters
- What You’ll Need Before You Start
- How to Remove Silicone From a Shower Enclosure
- Preparing Surfaces: Cleaning and Drying
- Where to Apply Silicone in a Shower Enclosure
- Step-by-Step Application Process
- How Long Does Shower Silicone Take to Dry
- Diagnosing and Preventing Shower Enclosure Leaking at the Bottom
- Frequently Asked Questions
Last Updated: October 18, 2026
Why Properly Sealing Your Shower Enclosure Matters
Water damage is one of the costliest problems a homeowner can face.
Properly sealing bathroom shower enclosures stops water before it becomes a crisis.
The good news: you can seal a shower enclosure yourself with patience, the right materials, and knowledge of where water travels.
This guide covers how to seal bathroom shower enclosures by removing old sealant, preparing surfaces, applying new silicone, and diagnosing leaks before they become expensive problems.
What You’ll Need Before You Start
Tools and Materials
Gather these items before you begin:
- Silicone sealant (sanitary-grade, mold-resistant formulation)
- Caulking gun (standard manual or battery-powered)
- Sealant remover tool (plastic scraper or specialized remover)
- Cleaning solution (mild detergent or bathroom cleaner)
The most important choice is the sealant itself. Use sanitary silicone or bathroom-grade silicone, not standard caulk. It resists mold and mildew better and stays flexible longer in wet environments, so check the label for “mold-resistant” or “antimicrobial.”
Safety Considerations
Work in a well-ventilated area, open windows or run the exhaust fan, since silicone releases fumes as it cures. Wear gloves throughout, since silicone is hard to remove from skin, and consider a dust mask while scraping old sealant. Keep the area dry; wet surfaces compromise adhesion.
How to Remove Silicone From a Shower Enclosure
Old sealant must come out completely before you apply new material.
Step 1: Soften the old sealant
Apply a sealant remover per product instructions, or use rubbing alcohol or white vinegar.
Step 2: Scrape away the sealant
Use a plastic scraper or old utility knife held at a shallow angle (about 30 degrees).
Step 3: Remove remaining residue
After scraping out the bulk, wipe away sticky residue with rubbing alcohol and a cloth, scrubbing tight corners with an old toothbrush.
Step 4: Final wipe-down
Rinse the area with clean water and dry completely with a lint-free cloth.
Preparing Surfaces: Cleaning and Drying
This step determines whether your new sealant lasts five years or fails in six months.
Clean all surfaces thoroughly. Use a bathroom cleaner or mild detergent and water.
Rinse with clean water multiple times. Any cleaner residue left behind will create a barrier between the sealant and the surface.
Dry everything completely. Wipe all surfaces with clean, lint-free cloths, then wipe again.
Where to Apply Silicone in a Shower Enclosure
This is where most DIY attempts go wrong. Many people seal every edge, trapping water, while others miss the one joint that lets water escape. The right answer depends on your enclosure type, not a universal rule.
Inside vs. Outside Sealing: The Principle
Inside sealing happens on the shower-interior side of a joint, the face that gets wet during use, your primary water barrier, and almost always sealed.
Outside sealing happens on the bathroom-facing side of the frame or where the enclosure meets the wall.
A useful rule of thumb: seal the wet side, leave the dry side open unless the manufacturer says otherwise.
Sealing every edge of a framed enclosure is one of the most common causes of “mystery” leaks. Water enters through a weep hole or a fastener, cannot escape, and shows up on the bathroom floor days later. Always check the manufacturer’s installation guide before you seal the outside face.
Match the Sealing Plan to Your Enclosure Type
Different enclosures shed water differently.
Frameless glass with wall brackets and a threshold strip. Seal the wall-to-glass and floor-to-glass junctions on the inside.
Sliding (bypass) doors. The bottom track typically has drainage slots.
Walk-in or open panels. These rely on a sloped tray and a fixed panel rather than a door seal.
Steam or fully enclosed units. These are the exception: manufacturers often specify a continuous seal on both faces to contain steam.
Critical Joints and Seams
Regardless of enclosure type, these are the high-risk joints to inspect and seal on the wet side:
- Tray-to-wall junction where the shower base meets the wall
- Frame-to-wall junction where the metal or plastic frame meets tile or wall
- Frame-to-glass junction where glass panels sit in the frame channel
- Threshold or bottom-rail ends where the rail meets the wall or side panel
Work through them in that order, then walk the enclosure with a dry paper towel and look for any gap that lets light through.
Reading the Manufacturer’s Instructions
Every enclosure ships with a diagram showing where sealant is and is not required. Before you pick up the caulking gun:
- Find the installation manual (paper copy or the manufacturer’s website).
- Look for the sealant diagram, often labeled “sealing points” or “silicone application.”
- Note any joints marked “do not seal” or shown with a drainage arrow.
- Check whether the manual specifies a silicone type (neutral-cure vs. acetic-cure) or a color.
If the manual is missing, contact the manufacturer with the model number from the frame or glass etch. Guessing on a framed enclosure is how water ends up behind the tile.
The goal is not to seal the most edges, it is to seal the right edges. Wet-side joints stop water from entering; dry-side gaps let the frame drain. When in doubt, follow the manufacturer’s diagram rather than a generic online rule.
Step-by-Step Application Process
Applying Sealant with a Caulking Gun
Step 1: Load the caulking gun
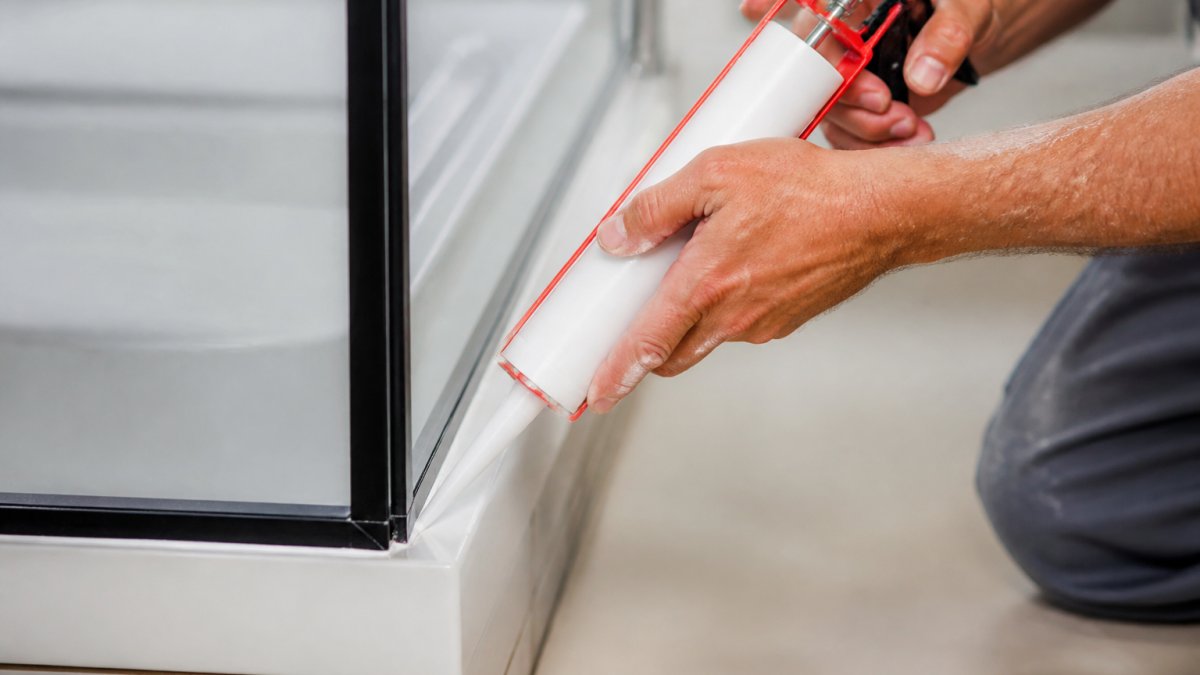
Insert the silicone cartridge with the nozzle pointing forward.
Step 2: Cut the nozzle at a 45-degree angle
Use a utility knife to cut the cartridge nozzle at a 45-degree angle, and cut small, you can always cut more.
Step 3: Apply steady pressure
Hold the gun at a 45-degree angle to the joint and squeeze the trigger steadily as you move along the seam at a consistent speed.
Step 4: Don’t overfill
A common mistake is applying too much sealant. Excess is harder to smooth and takes longer to cure.
Smoothing the Sealant Bead
After you’ve applied sealant to a section, smooth it immediately, while it’s still wet.
Use a wet finger or smoothing tool. Dip your finger in soapy water (a few drops of dish soap works well) and run it along the bead with firm, steady pressure.
Wipe excess immediately. Have a damp cloth ready and wipe away any excess sealant after smoothing each section, before it begins to set.
How Long Does Shower Silicone Take to Dry
Patience here is critical.
Initial set time is typically 24 hours.
Full cure time is usually 48-72 hours, depending on the product and humidity levels.
During the cure period, keep the bathroom dry if possible. Run the exhaust fan continuously.
After 72 hours, your sealant should be fully waterproof and flexible. You can shower normally.
Diagnosing and Preventing Shower Enclosure Leaking at the Bottom
Water at the bottom of a shower enclosure does not always mean the silicone failed. Resealing a joint that was never the problem wastes a weekend and leaves the real leak running. Before you pick up a scraper, work through the diagnosis in order.
Step 1: Confirm It Is the Enclosure, Not the Plumbing
A plumbing leak and an enclosure leak look similar from the bathroom floor. Separate them first.
- Dry test. Stop using the shower for 24 hours and dry the floor thoroughly. If water reappears without anyone showering, suspect supply or drain plumbing, not the enclosure.
- Drain test. Pour a bucket of water directly down the drain (not over the tray) and watch for moisture below or beside the tray. A leak here points to the drain fitting or waste pipe.
- Spray test. With the drain plugged, spray the enclosure walls and door from the inside for a few minutes, keeping water away from the drain. If moisture appears outside, the enclosure is the source.
If the plumbing tests fail, call a plumber before resealing. New silicone will not fix a failed drain seal.
Step 2: Check the Frame Drainage Paths
Framed enclosures are designed to shed small amounts of water through weep holes or slots in the bottom rail. When those holes clog with soap scum, hair, or old sealant, water backs up inside the frame and exits onto the bathroom floor.
- Inspect the outside face of the bottom rail for small holes or slots.
- Clear them with a toothpick or a short burst of water from a spray bottle.
- If a previous owner sealed over the weep holes with silicone, cut that bead away and reopen the holes.
A leak that appears only after a long shower, and stops on its own, is a classic sign of blocked frame drainage rather than a failed bead.
Step 3: Inspect the Silicone Itself
Failed silicone has recognizable signs. Look for:
- Pull-away where the bead has separated from the tile, tray, or frame, leaving a visible gap.
- Cracks running across the bead, often from movement or from a bead applied too thin.
- Black or pink discoloration underneath or behind the bead, which indicates mold growing in a failed joint.
- Soft or tacky texture when pressed, a sign the product has broken down.
If the bead is intact, flexible, and firmly bonded, it is probably not the leak source. Move on.
Step 4: Check Grout, Tile, and Tray Condition
Silicone is only one part of the water barrier. Water can bypass a perfect bead through:
- Cracked or missing grout on the shower walls or floor, especially at inside corners.
- Loose or drummy tiles where water has already gotten behind the surface.
- Cracks in an acrylic or stone tray, which sealant cannot repair.
- Failed seals around the drain flange, which need a plumber or a drain reseal, not a bead of silicone.
Press on tiles near the leak with a plastic tool handle. A hollow sound suggests debonding. If the tray is cracked, stop and get it assessed before resealing.
Step 5: Check Fittings and Door Hardware
Loose hinges, handle screws, and shower-valve escutcheons can let water into the wall or frame. Tighten hardware and check for missing gaskets or O-rings. A leak that appears only when the shower is running, and tracks down a wall, often starts at a fitting rather than a joint.
Common Mistakes to Avoid
Sealing over dirt or moisture. The most common reason new sealant fails.
Sealing the wrong location. Some enclosures have deliberate drainage paths.
Not removing old sealant completely. Layering new sealant over old material creates weak spots that water finds.
Rushing the cure time. Using the shower before the sealant is fully cured compromises the entire bead.
Not maintaining the sealant. Check the bead every six to twelve months.
Keep a photo of the manufacturer’s sealing diagram on your phone before you start. When a leak appears months later, you will know which joints were meant to be sealed and which were meant to drain.
Frequently Asked Questions
Where should silicone be applied on a shower enclosure?
Apply silicone sealant to all joints where water could penetrate: the tray-to-wall seam, frame-to-wall connections, and around the threshold. Focus on the inside seam where water collects, and seal frame joints on the outside to prevent water from running behind the enclosure. Avoid sealing drainage channels that are designed to direct water away from vulnerable areas. Check your enclosure manufacturer’s instructions, as some frames have specific sealing requirements based on their drainage design.
How long does shower silicone take to dry before you can use the shower?
Most sanitary silicone sealants require 24-48 hours to cure fully before exposing them to water. Check your product’s instructions, as curing times vary. Even if the surface feels dry after a few hours, the sealant needs time to develop its waterproof seal throughout its depth. Rushing this step is a common reason showers leak shortly after resealing. Mark your calendar and wait the full recommended time before your first shower.
How do you remove old silicone from a shower enclosure?
Cut away loose material with a utility knife, then apply a sealant remover product and let it sit for the recommended time (usually 15-30 minutes). Scrape away softened silicone with a plastic tool or old credit card to avoid scratching surfaces. For stubborn residue, repeat the process. Clean the area thoroughly with a damp cloth and let it dry completely before applying new sealant. Proper removal prevents adhesion problems and ensures your new seal will last.
Can you apply new silicone over old silicone?
No. New silicone will not adhere properly to old sealant, and water will seep underneath, causing leaks and mold growth. Always remove the old silicone completely before resealing. This takes extra time but is essential for a waterproof seal that will actually protect your bathroom from water damage. Skipping removal is a false economy that typically leads to problems within months.
