
Table of Contents
- Why Vancouver Bathrooms Face Constant Moisture Pressure
- What You’ll Need Before You Start
- Step 1: Seal Every Joint and Grout Line
- Step 2: Ventilate to Cut Condensation
- Bathroom Waterproofing Standards That Actually Matter
- Signs of Mold Behind Bathroom Tiles to Watch For
- Your Bathroom Plumbing Maintenance Checklist
- When to Call a Professional
- Frequently Asked Questions
Last Updated: September 14, 2026
Why Vancouver Bathrooms Face Constant Moisture Pressure
Preventing water damage in Vancouver bathrooms starts with understanding why this region is uniquely hard on bathroom materials, and preventing water damage in Vancouver bathrooms begins with the same insight. Vancouver’s wet, mild coastal climate means indoor humidity stays high for much of the year, and bathrooms here rarely get a chance to dry out completely between showers. This guide from Bathroom Renovators draws on over 26 years of renovating homes to explain what actually fails, why it fails, and how to stop it.
The rain-heavy months bring persistent damp air that seeps into every gap. Add daily showers, and a typical bathroom becomes the wettest room in the house. Most water damage we see isn’t from a dramatic burst pipe. It’s slow: a hairline grout crack, a failed caulk bead, a fan that stopped pulling air years ago. By the time a homeowner notices a soft spot or a musty smell, the damage has usually been building for months.
Below, we’ll walk through seven practical steps to protect your bathroom, plus the warning signs that mean it’s time to bring in a professional.
The most expensive mistake we see is treating a small stain on the ceiling below a bathroom as a cosmetic issue. That stain usually means water has already traveled through the subfloor, and delaying a fix lets rot and mold spread into framing that costs far more to repair.
What You’ll Need Before You Start
Gather the right materials before you touch a single tile. Waterproofing a bathroom is only as good as the products you use, and the wrong sealant or grout will fail within a season in this climate.
- Silicone-based bathroom sealant rated for wet areas
- A caulking gun and a removal tool for old sealant
- Epoxy or cement-based grout designed for high-moisture rooms
- A squeegee and a microfibre cloth
- A hygrometer to measure room humidity
- A bathroom exhaust fan rated for your room’s square footage
Total time: roughly 3-4 hours for a basic inspection and reseal, spread across a weekend. Difficulty: beginner to intermediate.
Silicone beats acrylic caulk every time in a shower. Acrylic shrinks and cracks as it cures, which is exactly where water gets in. If you’re resealing, strip the old bead completely rather than layering new sealant over it. New caulk won’t bond to old, dirty caulk, and the joint will fail again within months.
Step 1: Seal Every Joint and Grout Line
Water gets into a bathroom through the joints, not the tiles. Grout and caulk are the only things standing between your shower and the wood framing behind it, so they deserve more attention than most homeowners give them.
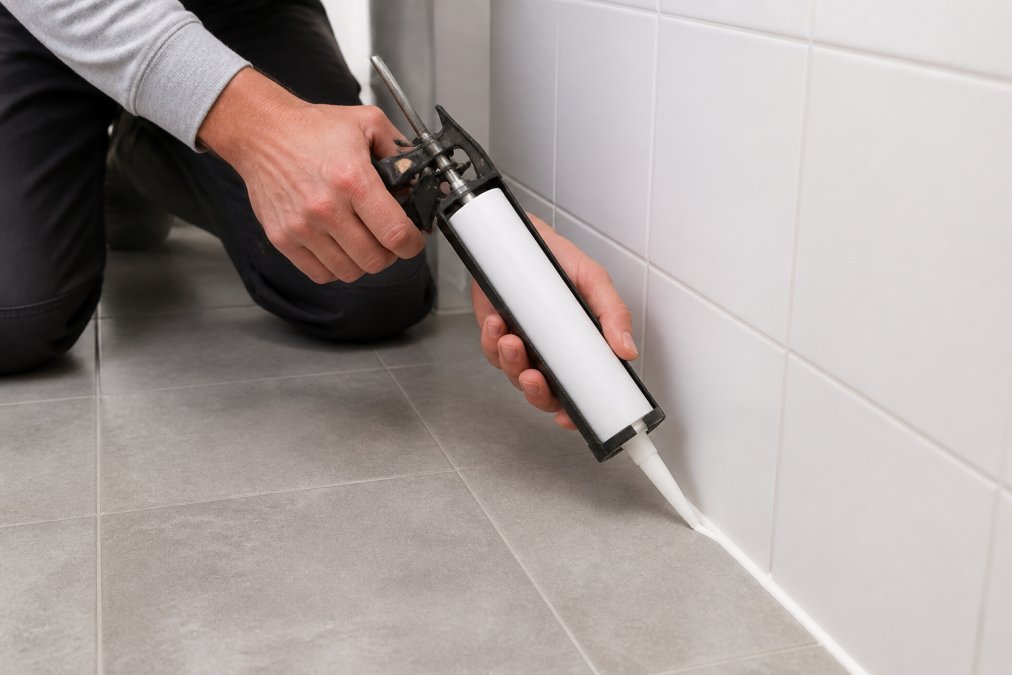
Work through every vulnerable joint: where the wall meets the floor, where the tub meets the surround, around the faucet and showerhead, and along any change in plane. Check the grout lines on the floor and lower walls first, since these take the most splash. A common mistake is sealing only the obvious spots and ignoring the corners, which is where water pools and sits.
Reapply sealant roughly once a year in a shower that gets daily use. If you can peel a bead of caulk back with your fingernail, it’s already failed. For grout, a penetrating sealer every 12-18 months keeps it water-resistant. The Canada Mortgage and Housing Corporation’s guidance on moisture and mold is a solid reference for how much moisture a home can safely handle.
Step 2: Ventilate to Cut Condensation
An exhaust fan is the cheapest water-damage prevention you’ll ever install, and it’s the one most often ignored. A bathroom without working ventilation traps steam, and that steam condenses on cold surfaces, then drips into places you can’t see.
Run the fan during every shower and for at least 15-20 minutes afterward. If your fan is loud, weak, or original to the house, it’s probably undersized. Fans are rated in cubic feet per minute, and a small bathroom needs a fan that can fully exchange the air several times an hour. A quiet fan you’ll actually use beats a powerful one you switch off after a minute.
Watch for these ventilation failures:
- Fogged mirrors that stay fogged long after a shower
- Peeling paint or bubbling on the ceiling above the shower
- A fan that moves so little air you can’t feel it with your hand
- No window, or a window that stays shut all winter
If condensation still forms on the walls after a 20-minute fan run, the fan isn’t the problem alone. The room may need a larger unit or a duct repair.
Bathroom Waterproofing Standards That Actually Matter
Bathroom waterproofing standards exist to keep water out of your home’s structure, and in Canada the key reference is the National Building Code, which sets out where and how wet areas must be protected. The code requires a waterproof membrane in shower areas and behind tile in wet zones, and it specifies how those layers must be installed and tied into drains.
For a renovation, that means a proper membrane system behind the tile, not just tile over drywall. This is the single biggest difference between a bathroom that lasts and one that leaks within a few years. A membrane is a continuous sheet or coating that stops water from reaching the framing, and it must run up the walls and overlap correctly at the corners.
What most homeowners never see is the layer behind the tile. When you’re hiring for a renovation, ask directly how the shower will be waterproofed and what membrane product will be used. A contractor who can’t answer that clearly is a risk. For the official requirements, the National Research Council of Canada’s National Building Code is the authoritative source, and local permitting rules build on it.
Ask any contractor to show you photos of the waterproofing stage before the tile goes on. If they can’t produce them, you have no way of knowing whether a membrane was installed at all, and that’s the one detail that decides whether the shower leaks in year two or year twenty.
Signs of Mold Behind Bathroom Tiles to Watch For
Mold behind tiles rarely announces itself. The signs of mold behind bathroom tiles are usually subtle at first: a persistent musty smell, dark discoloration in the grout that won’t scrub out, or tiles that feel slightly loose or hollow when tapped.
Catch these early and you can often fix the cause without a full tear-out. Ignore them and the mold spreads into the wall cavity, where it damages framing and can affect indoor air quality. The Health Canada information on mold and indoor air explains why damp indoor spaces need prompt attention.
Watch for:
- A musty or earthy smell that returns even after cleaning
- Grout lines that stay dark no matter how hard you scrub
- Tiles that sound hollow or feel spongy underfoot
- Paint or caulk that keeps peeling in the same spot
- A soft, discolored patch on the ceiling below the bathroom
Loose tiles are the clearest signal. When tile pulls away from the wall, it usually means the backing has swollen from moisture, and by that point the problem is behind the surface, not on it.
Your Bathroom Plumbing Maintenance Checklist
A short, regular routine prevents most of the water damage we’re called in to fix. Use this bathroom plumbing maintenance checklist and run through it every few months.
- Check under the sink for drips or staining on the cabinet base
- Test the toilet for leaks by watching the bowl for ripples between flushes
- Inspect the supply lines to the toilet and sink for cracks or corrosion
- Look at the caulk and grout around the tub and shower for gaps
- Run the exhaust fan and confirm it’s pulling air
- Check the ceiling below the bathroom for stains or soft spots
- Clear the drain of hair and soap buildup to prevent overflow
The toilet is the most common hidden leak. A worn flapper lets water trickle continuously, and that slow leak can quietly rot the subfloor over months. Supply lines are the other weak point: braided steel lines are far more reliable than old rubber ones, and they’re inexpensive to replace. If a line is bulging or shows rust at the fitting, swap it before it fails.
Most bathroom water damage traces back to three things: failed sealant, poor ventilation, and a slow leak nobody checked. A 15-minute inspection every few months catches all three before they turn into a renovation.
When to Call a Professional
Call a professional when you find soft flooring, persistent mold, a leak you can’t trace, or water staining on the ceiling below the bathroom. These point to damage inside the wall or floor structure, and surface fixes won’t solve them.
There’s a real difference between maintenance and repair. Resealing a joint is a weekend job. Replacing a rotted subfloor, rebuilding a shower pan, or removing mold from framing is not. If you’re already seeing loose tiles or a spongy floor, the waterproofing has failed and the assembly needs to come apart to be fixed properly. This is the work Bathroom Renovators handles, and it’s also where a 7-10 day timeline makes a real difference: the longer a bathroom sits torn open, the more moisture it takes on.
At Bathroom Renovators, we’ve spent over 26 years working on homes exactly like yours, and we back every project with a 1-year warranty. We spec materials that hold up to this climate, show up when we say we will, and clean up after ourselves. If you’ve found signs of water damage and aren’t sure how far it goes, get your free consultation.
Water damage in a bathroom is rarely sudden, and that’s what makes it easy to ignore until it’s expensive. The homeowners who avoid the worst of it are the ones who check the small things on a schedule and call for help the moment something looks wrong. If you’re facing soft floors, recurring mold, or a leak you can’t pin down, get started with Bathroom Renovators. We’ll assess the damage, explain exactly what’s happening behind the tile, and give you a clear plan with a free consultation and a 1-year warranty behind the work.
Frequently Asked Questions
What are the most common causes of bathroom water damage?
The most common causes are failed caulking and grout, leaking supply lines or valves, clogged drains that overflow, and poor ventilation that traps condensation. In Vancouver’s damp climate, these issues worsen faster because walls and floors stay wet longer. A slow drip behind a wall can rot framing for months before you notice. Regular checks of seals, pipes, and airflow catch most problems early.
How do I know if I have hidden water damage behind my bathroom walls?
Watch for soft or spongy drywall, paint that bubbles or peels, a musty smell that won’t go away, and discolored patches on ceilings below the bathroom. Loose tiles or grout that crumbles also point to moisture behind them. If you press on the wall near the shower and it feels soft, water has likely been seeping in. A professional moisture meter confirms it.
What building codes apply to bathroom waterproofing in this region?
Bathroom waterproofing must meet the National Building Code of Canada and the BC Building Code, which set requirements for moisture barriers in wet areas like showers and tub surrounds. These codes specify membrane thickness, overlap, and coverage for floors and walls. Local municipalities may add inspections. A qualified renovator knows these rules and builds to them, which protects your home and your insurance coverage.
Does home insurance cover bathroom water damage caused by slow leaks?
Most Canadian home insurance policies cover sudden and accidental water damage, such as a burst pipe, but slow leaks that developed over time are often excluded. Insurers expect homeowners to maintain plumbing and address small drips promptly. Documenting regular maintenance and fixing issues quickly strengthens your case if you file a claim. Review your policy wording or ask your broker about leak coverage.
