
Table of Contents
- What Bathroom Vanity Installation Services Include
- How Long Does Bathroom Vanity Installation Take?
- Questions to Ask Before Hiring a Bathroom Contractor
- Creating Your Bathroom Renovation Contractor Checklist
- Choosing the Right Vanity for Your Space
- Common Installation Mistakes and How to Prevent Them
- What to Expect: The Installation Process from Start to Finish
- Frequently Asked Questions
Last Updated: October 14, 2026
What Bathroom Vanity Installation Services Include
Bathroom vanity installation services go far beyond swapping out a cabinet. Hiring a professional team for bathroom vanity installation gets you expertise in measuring, plumbing connections, electrical work if needed, and finishing touches that separate a DIY disaster from a bathroom that functions.
The core of bathroom vanity installation includes removing the old vanity, preparing the wall and plumbing rough-ins, installing the new cabinet, connecting sink and faucet, sealing everything properly, and ensuring drainage works without leaks. At Bathroom Renovators, we handle the full scope: we spec materials that hold up to moisture, and coordinate with any electrical or plumbing upgrades your space needs.
Most homeowners underestimate what a proper installation involves: the wall behind the vanity may need reinforcement, plumbing may need rerouting, and faucets may require new supply lines. A professional bathroom vanity installation service identifies these upfront and builds them into the timeline.
How Long Does Bathroom Vanity Installation Take?
Timelines for bathroom vanity installation services vary widely because scope varies widely. A like-for-like swap is a different project from a bathroom renovation that moves plumbing, replaces flooring, or adds a second sink. Knowing what drives the schedule helps you set realistic expectations and compare quotes fairly.
Here is a realistic breakdown by project type:
| Project Type | Typical Duration | What Drives the Timeline |
|---|---|---|
| Direct swap (same size, same plumbing location) | 1 day | Removal, reconnection, caulking, cleanup |
| Swap with minor wall or floor repair | 2-3 days | Patching, drying time for compounds, re-sealing |
| Vanity replacement with plumbing rerouting | 3-5 days | Rough-in changes, inspection scheduling, leak testing |
| Vanity as part of a full bathroom renovation | 2-4 weeks | Demolition, tile, waterproofing cure times, fixture installs, multiple trades |
What actually extends a timeline. The biggest variable is what’s behind the old vanity. Water damage, rotted framing, or plumbing that doesn’t align with the new cabinet’s openings can add days, and removal often reveals issues invisible at estimate. A contractor who builds in a contingency buffer is being honest, not slow.
Material lead times matter as much as labor. Custom vanities, quartz or marble tops, and specialty faucets can take weeks to arrive. If your project depends on a custom piece, installation can’t start until it’s on site. Ask when materials must be ordered and whether the schedule accounts for delivery delays.
Scheduling and access. With one bathroom, the crew may need to work around your routine. Condos may restrict work hours or require elevator booking for deliveries. These constraints don’t change labor hours but do change calendar days.
Ask for a written schedule with phases, not a single completion date. A phase-based schedule shows you when demolition, rough-in, installation, and finishing are expected to happen, which makes it easier to spot when a project is slipping.
How to compare timelines across quotes. Two contractors may quote the same duration but mean different things, one counting on-site labor days, another counting calendar days including curing, inspection, and delivery. Ask whether their estimate is working or calendar days, and whether it includes inspections and material lead times.
A vanity-only project usually finishes within a few working days once work begins; a full bathroom renovation including the vanity takes several weeks. The difference isn’t the vanity, it’s everything around it.
Questions to Ask Before Hiring a Bathroom Contractor
Before committing to any bathroom vanity installation services, ask these questions. They reveal whether you’re talking to a craftsman or someone cutting corners.
How do you handle unexpected problems? Ask what happens if they find water damage, rotted framing, or plumbing that doesn’t work with your new layout. Do they charge extra, or is there a cap? A good contractor has a process and won’t leave you guessing.
Can you provide recent references? Ask for three homeowners whose work was done in the last year, then call them. Ask if the crew showed up on time, cleaned up, and stood behind the work when something went wrong.
What’s included in your quote? Does the bathroom vanity installation price include removal of the old vanity, wall prep, plumbing connections, sink and faucet installation, caulking, and cleanup? Or are those add-ons? A transparent contractor lists everything upfront.
Do you carry liability insurance and warranty your work? This matters. If something breaks or leaks after installation, you want recourse. Ask what warranty covers and for how long.
How do you manage the timeline? Be skeptical of anyone promising a bathroom vanity installation in one day with no caveats. A contractor who explains their process and builds in buffer time is more reliable than one who guarantees speed.
Creating Your Bathroom Renovation Contractor Checklist
Use this checklist when vetting bathroom contractors for your vanity installation or larger bathroom renovation.
| Criteria | What to Look For | Why It Matters |
|---|---|---|
| Licensing & Insurance | Current business license, liability coverage, WSIB clearance | Protects you if someone gets hurt or property is damaged |
| Experience | portfolio of completed projects | Reduces risk of costly mistakes and poor craftsmanship |
| References | Recent clients (last 1-2 years) willing to discuss their experience | Reveals whether the contractor actually delivers on promises |
| Written Estimate | Detailed breakdown of labor, materials, timeline, and contingencies | Prevents surprise costs and sets clear expectations |
| Warranty | Gives you recourse if something fails after completion | |
| Communication | Responds promptly, explains process clearly, answers questions directly | Reduces stress and keeps the project on track |
| Cleanup Plan | Specifies how debris is removed and site is cleaned daily | Keeps your home livable during the renovation |
Before hiring, verify the contractor is licensed for plumbing and electrical work if your bathroom vanity installation requires it. In most provinces, plumbing work needs a plumber’s license, don’t assume “bathroom contractor” covers everything.
Choosing the Right Vanity for Your Space
The vanity you choose affects how your bathroom looks and functions. Before hiring anyone for bathroom vanity installation, decide what you actually want.
Measure your space first. Your bathroom’s width, depth, and plumbing rough-in location determine what size vanity fits. Too large crowds the room; too small leaves inadequate storage and a cramped sink. Measure from the wall to adjacent fixtures and note where plumbing exits the wall.
Consider your layout. In a small bathroom, a wall-mounted vanity exposes floor and feels larger; a freestanding vanity adds storage but visual bulk; corner vanities maximize awkward layouts. Your bathroom vanity installation contractor can advise, but start with an honest assessment of your space.
Choose materials that handle moisture. Solid wood warps and particleboard swells in damp bathrooms. Quality vanities use plywood or moisture-resistant materials with proper sealing. Shaker cabinets are durable and timeless; painted finishes hide wear but need maintenance; natural wood looks warm but demands more care.
Pick a sink and faucet that match your style and budget. A ceramic drop-in sink is affordable and easy to replace; an undermount looks cleaner but costs more; a vessel sink makes a statement but splashes. Single-handle faucets are convenient; two-handle faucets are traditional but take up more space.
Common Installation Mistakes and How to Prevent Them
Most bathroom vanity installation problems stem from rushed prep work or skipped measurements. Here’s what goes wrong and how to avoid it.
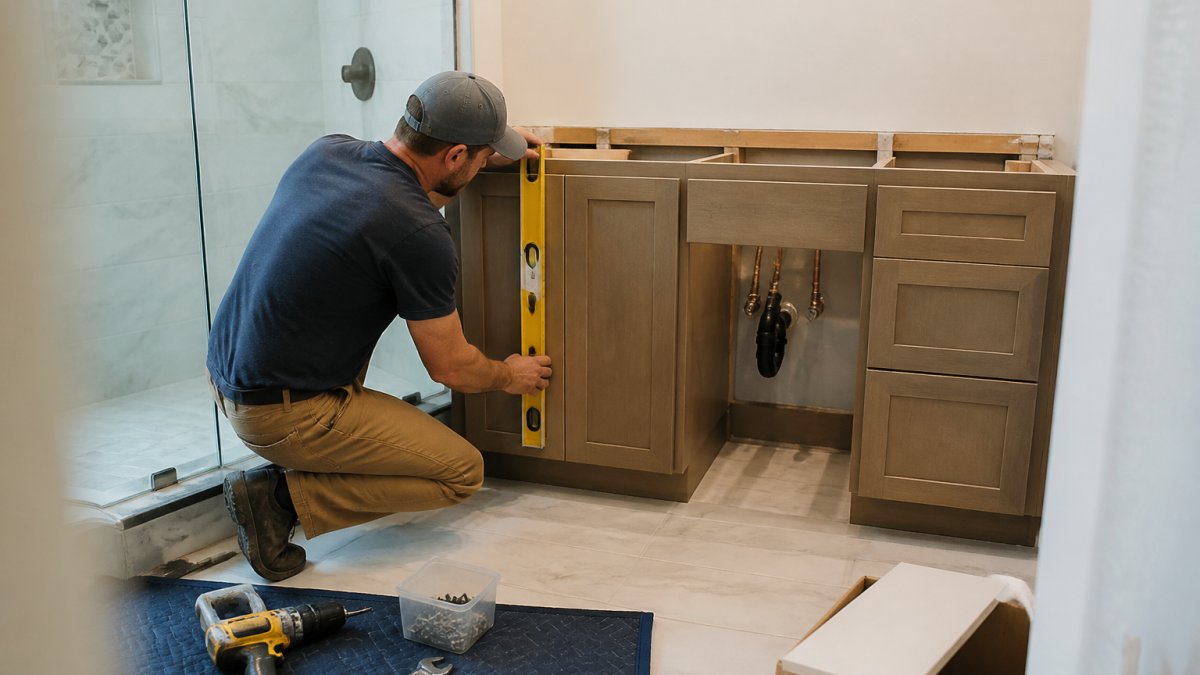
Not checking for level. An unlevel vanity looks crooked and creates gaps where water seeps behind the cabinet. The fix: check level in multiple directions before fastening and shim if needed.
Ignoring plumbing rough-in locations. If supply lines and drain don’t align with the vanity’s openings, you force leaky connections or pay to reroute plumbing. The fix: measure your rough-in before ordering, or have your contractor confirm the vanity will fit before work begins.
Inadequate wall support. A heavy vanity with a marble or quartz top needs solid backing, drywall alone won’t hold it. The fix: install blocking at the stud locations behind the vanity, which takes an extra hour but prevents sagging or pull-away.
Poor caulking and sealing. Water gets behind unsealed vanities and causes rot. The fix: caulk the seams where the vanity meets the wall and around the sink, using silicone rather than acrylic so it stays flexible as materials expand and contract.
Forgetting about ventilation. A bathroom without proper exhaust traps moisture, leading to mold and cabinet failure. The fix: ensure a functioning exhaust fan vents outside, and run it during and for 30 minutes after every shower.
What to Expect: The Installation Process from Start to Finish
Understanding the bathroom vanity installation process helps you plan your schedule, prepare your home, and know what to expect at each stage. The sequence below reflects how a professional team typically approaches a vanity installation, standalone or within a larger bathroom renovation.
Step 1: Consultation and measurement. The contractor measures the space, notes plumbing rough-in locations, checks wall construction, and discusses your goals. Raise questions about layout changes, storage, and single versus double vanity.
Step 2: Written estimate and scope. You receive a written estimate breaking down labor, materials, and allowances for fixtures or finishes.
Step 3: Permits and code considerations. Overlooking this stalls projects. In many jurisdictions, changing plumbing rough-in locations or adding electrical circuits requires a permit and inspection.
Never assume a contractor will handle permits unless it’s stated in the contract. Unpermitted plumbing or electrical work can create problems when you sell your home, and it may void insurance coverage if a leak or fire occurs.
Step 4: Material ordering and lead times. Once scope is confirmed, materials are ordered. Custom vanities, stone countertops, and specialty fixtures can take weeks. Set the installation date with lead times in mind, not before.
Step 6: Rough-in and wall preparation. Plumbing or electrical changes happen now. The wall is patched, reinforced with blocking where the vanity fastens, and prepared for the new cabinet.
Step 7: Vanity installation. The new cabinet is positioned, checked for level in multiple directions, shimmed if needed, and secured to wall studs.
Step 8: Sink, faucet, and finishing. The sink is set and sealed, the faucet connected and tested, and caulk applied where the vanity meets the wall and around sink edges.
Step 9: Inspection and walkthrough. If permits were required, inspection happens before the project is complete.
How this differs from a handyman approach. A handyman can swap a vanity, but plumbing changes, electrical work, and permit tasks generally require licensed trades.
A well-run vanity installation follows a predictable sequence: consult, estimate, permit if needed, order materials, demolish, rough-in, install, finish, inspect. Knowing the sequence lets you ask better questions and spot when a project is cutting corners.
Frequently Asked Questions
How long does bathroom vanity installation typically take?
Most bathroom vanity installations can be completed in 7-10 days when handled by an experienced team. This timeline includes removal of the old vanity, plumbing adjustments, cabinet installation, sink and faucet setup, and sealing. The exact duration depends on whether additional plumbing work or wall repairs are needed. Delays often occur when hidden water damage or structural issues are discovered during removal, which is why discussing potential complications with your installer beforehand is essential.
What should I ask a bathroom vanity installer before hiring?
Ask about their experience with projects similar to yours, how they handle unexpected problems found during installation, whether their quote includes removal of the old vanity, and what warranty they provide on their work. Request recent references and confirm they carry liability insurance. Clarify whether plumbing permits are included and who handles inspections. Ask about their cleanup process and whether the timeline is guaranteed or estimated. Understanding these details upfront prevents surprises and ensures you hire someone reliable.
Does bathroom vanity installation require plumbing work?
Yes, most installations involve plumbing connections. Your installer will disconnect the old supply lines and drain, then reconnect them to the new vanity’s sink and faucet. If you’re upgrading to a different vanity size or layout, additional plumbing adjustments may be necessary. Some installations also require venting adjustments to meet code. A professional installer assesses your existing plumbing setup and determines what modifications are needed to ensure proper drainage and water supply to your new fixtures.
How do I choose a reliable bathroom renovation contractor?
Look for contractors with established experience in bathroom renovations, verifiable references from recent projects, and proper licensing and insurance. Check their online reviews and ask about their process for managing timelines and budgets. A reliable contractor provides a detailed written quote, explains what happens if problems are discovered during work, and stands behind their craftsmanship with a warranty. Request to speak directly with past clients and confirm the contractor shows up on time and cleans up after themselves, these habits reveal professionalism.
