
Table of Contents
- Why Bathroom Renovation Dust Spreads Through an Occupied Home
- How to Contain Construction Dust Before Work Begins
- Choosing Dust Barriers for Home Renovation
- Bathroom-Specific Ventilation and HVAC Protection
- Dust Control Sequence by Renovation Phase
- How to Clean Up Dust After Renovation
- Renovation Dust Cleanup Checklist for Occupied Homes
- Conclusion
- Frequently Asked Questions
Last Updated: October 6, 2026
Why Bathroom Renovation Dust Spreads Through an Occupied Home
Bathroom renovation dust is the fine mix of drywall, tile, grout and wood particles that spreads the moment demolition starts.
The particles you cannot see cause the most trouble.
Dust from a bathroom tear-out is finer than most people expect. It floats for hours, then lands on bedding, food prep areas and inside closets.
That is exactly what this guide covers: how to contain construction dust, how to clean up dust after renovation, and a full renovation dust cleanup checklist you can follow from day one.
The biggest mistake is starting demolition before any barrier is up. Once the first wall comes down, dust is already moving through the house, and no amount of later cleaning fully undoes it.
How to Contain Construction Dust Before Work Begins
Containment starts before the first tool comes out. Here is the order we use on every project.
- Walk the path from the front door to the bathroom and note every opening.
- Decide where the work zone ends and the living space begins.
- Set up barriers and floor protection before demolition starts.
- Brief everyone in the home on which doors stay closed.
Seal Doorways, Vents, and Gaps
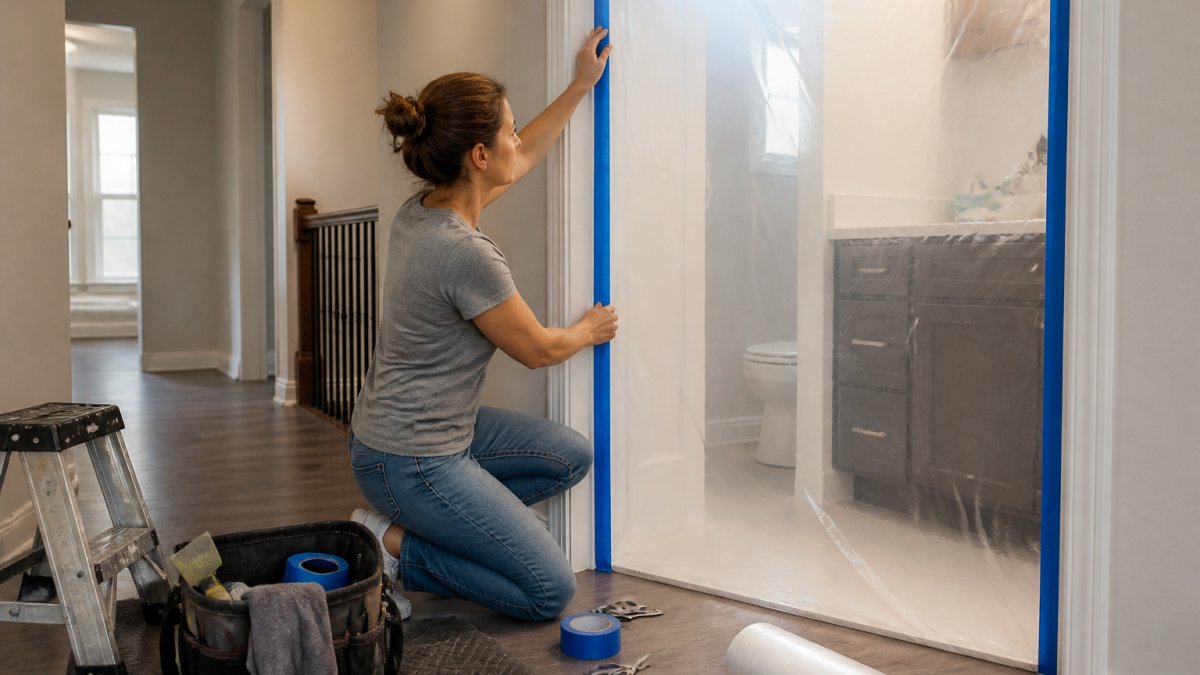
Doorways are the main escape route for dust. Tape plastic sheeting across each one, floor to frame, overlapping the edges.
Do not forget the small openings:
- Bathroom exhaust vents and floor registers
- Gaps under closet doors along the path
- The space under the bathroom door itself
Cover vents with plastic and tape, but leave one window in the work zone available for ventilation. Sealing everything with no airflow turns the bathroom into a dust box that spills out the moment the barrier comes down.
Protect Floors, Furniture, and Belongings
Floor protection stops dust settling into carpet and guards against dropped tools and tile chips. Use heavy drop sheets or rigid covering along the whole route, not just inside the bathroom.
Choosing Dust Barriers for Home Renovation
Dust barriers for home renovation fall into three groups: taped plastic sheeting, zipper doors, and rigid panels. The right choice depends on job length and traffic.
For most occupied homes, we use a mix: sheeting for walls and vents, and a zipper door for the main entry point.
Plastic Sheeting and Zipper Doors
Standard plastic sheeting is cheap, flexible and easy to tape into odd shapes; six-mil thickness holds up for a full renovation cycle.
Zipper doors solve plain sheeting’s biggest weakness: access.
A rigid panel suits very long projects or constant traffic. It costs more and takes longer to install, but survives daily use.
| Barrier Type | Best For | Access | Setup Time |
|---|---|---|---|
| Plastic sheeting | Walls, vents, short jobs | Peel and re-tape | Fast |
| Zipper door | Main entry point | Zip open and closed | Moderate |
| Rigid panel | Long projects, heavy traffic | Hinged door | Slow |
Bathroom-Specific Ventilation and HVAC Protection
A bathroom is the hardest room to keep dust out of: it is small, connected to the rest of the home through ductwork, and generates moisture.
The goal is a pressure difference, not just a barrier: keep the work zone at slightly lower pressure so air moves in, not out through every gap in the plastic.
Exhaust Fans, Windows, and Makeup Air
The existing exhaust fan helps, but only if you understand it. A typical fan moves a modest volume of air to the exterior; during light work it clears fine particles, but heavy demolition can overwhelm it, and an old or blocked duct may recirculate more than it removes.
A few practical rules:
- Run the exhaust fan during sanding, cutting and cleanup, not just during demolition.
- Pair the fan with an open window so replacement air has somewhere to come from. A fan with no makeup air just stalls.
- If the fan is noisy, weak, or more than a decade old, treat it as a supplement, not your primary ventilation.
Protecting the HVAC System
The central furnace or heat pump is the biggest dust distribution network in most homes. A return grille near or inside the work zone will pull fine dust into the ductwork and redistribute it for days. The sequence that works:
- Identify every return-air grille on the same floor as the bathroom, not just the one in the room.
- Seal the nearest returns with plastic and tape before demolition begins.
- Switch the thermostat to fan-off so the blower does not run on its own schedule.
- Leave the returns sealed until the work zone has been fully cleaned.
- Replace the furnace filter after the project, and consider a higher-efficiency filter if the household is sensitive to dust.
Supply registers in the bathroom itself should also be covered, because a running system will push air into the room and stir settled dust.
Air Scrubbers and HEPA Filtration
An air scrubber with HEPA filtration is the most effective single piece of equipment for a small bathroom. It captures particles at the source before they settle or escape. Place it inside the work zone, near the dust-generating activity, and run it continuously during cutting, sanding and cleanup. One scrubber sized for the room volume is enough; clean the pre-filter daily during heavy work, since a clogged one drops performance fast.
Run the air scrubber for at least an hour after the last work of the day. Most of the fine dust that would otherwise settle overnight is still airborne when the tools stop.
Managing Moisture
Because bathrooms are damp by nature, dust behaves differently here than in a bedroom or hallway. Damp dust clings to tile, glass and painted surfaces, and dry sweeping smears it. Use damp cloths and a HEPA vacuum rather than a broom, and avoid humidifiers or standing water in the work zone. If a shower or tub stays in use, keep it covered and dry surrounding surfaces before sanding or cutting.
Dust Control Sequence by Renovation Phase
Dust control changes with each phase, and the biggest mistakes happen at the transitions. This sequence keeps an occupied home livable from first hammer swing to final wipe-down.
Before Demolition
This phase decides how the rest of the project goes. Once the first wall comes down, dust is already moving, and no amount of later cleaning undoes a missing barrier.
- Walk the route from the entry door to the bathroom and note every opening, including closet doors and floor registers.
- Set up plastic sheeting on doorways, zipper doors at the main access point, and floor protection along the full path.
- Seal return-air grilles and supply registers on the same floor.
Demolition Phase
Dust generation peaks here. Capture debris at the source rather than letting it settle.
- Bag or box debris as it is created. Do not let piles accumulate on the floor.
- Mist drywall and tile surfaces lightly with water before breaking them up, which reduces airborne particles.
- Vacuum cut lines and the floor at the end of each workday with a HEPA vacuum.
Rough-In Phase
Plumbing and electrical work generates less visible dust but plenty of fine particles from drilling and cutting.
- Keep all barriers in place. Do not take them down because the room looks clean.
- Vacuum around cut lines immediately rather than waiting for end of day.
- Wipe surfaces with a damp cloth at the end of each shift.
Finishing Phase
Sanding, drywall compound and paint prep create the finest dust of the project, and fine dust is the hardest to contain.
- Use sanders with dust extraction or a shop vacuum attachment rather than sanding by hand.
- Damp wipe rather than dry sweep between coats.
- Keep the air scrubber running continuously during sanding.
Final Phase and Barrier Removal
The order of the last steps matters: clean the work zone fully while the barrier is sealed, remove the barrier, then clean the path again.
- Vacuum and damp wipe ceilings, walls, trim, fixtures and floors inside the work zone.
- Remove the barrier and immediately clean the hallway or adjacent room along the route.
- Unseal vents and return-air grilles.
Most of the dust that ends up in the rest of the house escapes during barrier removal, not during the work itself. Cleaning the work zone before you take the plastic down is what prevents that second wave.
Keeping the Household Functional
An occupied home has to keep working while the bathroom is out of service. Plan for it in the same sequence:
- Identify a second bathroom or a temporary washing arrangement before demolition starts.
- Keep a clear, dust-free path to the kitchen, bedrooms and the working bathroom.
- Move pets and young children away from the work zone and the barrier path.
A simple daily rhythm, vacuum and wipe at the end of each shift, keeps the home livable without turning cleanup into a weekend project.
How to Clean Up Dust After Renovation
Post-renovation cleanup follows one rule: work top down and from the work zone outward.
Start with ceilings and light fixtures, then walls, counters, floors.
Use the right tools:
- A vacuum with HEPA filtration for hard surfaces and crevices
- Damp cloths for walls, trim and fixtures
- A second pass with clean water once the first cloth comes away dirty
Avoid dry sweeping. It lifts fine dust back into the air and undoes hours of work.
Hard-to-reach spaces deserve extra attention: tops of door frames, inside vanity cabinets, behind the toilet, along baseboards.
Health Canada guidance on indoor air quality
Renovation Dust Cleanup Checklist for Occupied Homes
Use this checklist to keep the home livable from start to finish.
Before work begins
- Clear the path and remove small items
- Tape plastic over every doorway on the route
- Seal vents, registers and the nearest return-air grille
During the project
- Bag debris as it is created, never let it pile up
- Vacuum cut lines and surfaces at the end of each day
- Keep the work-zone window open with a fan blowing out
After work ends
- Clean the work zone fully with the barrier still up
- Damp wipe ceilings, walls, trim and fixtures
- Vacuum and damp wipe floors twice
The single highest-impact habit is keeping the barrier sealed until the work zone is fully clean. Most dust that ends up in the rest of the house escapes during barrier removal, not during the work itself.
Conclusion
Keeping an occupied home livable during a bathroom renovation comes down to planning, not luck.
That is how we run every project at Bathroom Renovators. We seal and protect the space before we start, keep the work zone contained throughout, and clean up after ourselves before we leave.
Get your free consultation with Bathroom Renovators and find out how we keep your bathroom project clean, quick and stress-free.
Frequently Asked Questions
How do I clean up dust after a renovation?
Start from the top down: wipe ceiling corners, light fixtures, and walls with a damp microfiber cloth, then move to surfaces, baseboards, and floors. Use a vacuum with HEPA filtration instead of sweeping, which just pushes fine dust back into the air. Change your HVAC filter once the work is done, and repeat damp wiping over the next few days because fine particles settle again after you finish. A written renovation dust cleanup checklist keeps you from missing hard-to-reach spaces.
What should I seal off before bathroom renovation work begins?
Seal the bathroom doorway with plastic sheeting and a zipper door, cover supply and return vents inside the work zone, close HVAC registers in nearby rooms, and block the gap under the door. Move or cover furniture, linens, and toiletries from adjacent rooms. If the bathroom has a window, use it for exhaust where possible. Protecting air returns matters because dust pulled into your HVAC system can spread through the whole house, not just the hallway outside the bathroom.
How can I keep renovation dust from spreading through my home?
Containment does most of the work. Install plastic barriers at the work zone, seal doorways and openings, run an air scrubber or HEPA vacuum at the source, and avoid walking through the home in dusty clothes. Ask your renovator to use dust extraction on tools rather than dry sweeping. A daily cleaning plan during the project, not just at the end, keeps dust migration under control and your home livable while the bathroom renovation dust is being generated.
Is it safe to stay in my home during a bathroom renovation?
In most cases yes, especially for a short project like a 7-10 day bathroom renovation. The key is separating the work zone from living space with plastic barriers and zipper doors, protecting HVAC returns, and running filtration. Keep children and pets away from the work zone, and if anyone in the home has asthma or allergies, discuss extra filtration and scheduling with your renovator. If the work involves material hazards, your contractor should explain the specific precautions before starting.
