
Table of Contents
- What Is a Wet Room Bathroom Design?
- Wet Room Waterproofing Requirements: Tanking, Membranes, and Floor Gradients
- Small Wet Room Layout Ideas for Cramped Spaces
- The Cost of Installing a Wet Room: What Actually Drives the Price
- Structural and Subfloor Considerations Most Guides Skip
- Underfloor Heating and Accessibility: Two Upgrades Worth Planning For
- DIY vs. Professional Installation: Where Wet Rooms Go Wrong
- Pros and Cons of a Wet Room Bathroom
- Frequently Asked Questions
Last Updated: September 16, 2026
What Is a Wet Room Bathroom Design?
A wet room bathroom design is a fully waterproofed space where the shower sits open to the room, with no tray lip, curb, or enclosure. The entire floor is tanked and sloped so water drains through a floor waste rather than pooling against a threshold. At Bathroom Renovators, we build these across Vancouver, North and West Vancouver, Burnaby and Port Moody, and the difference between a wet room that lasts and one that leaks comes down to what happens under the tiles.
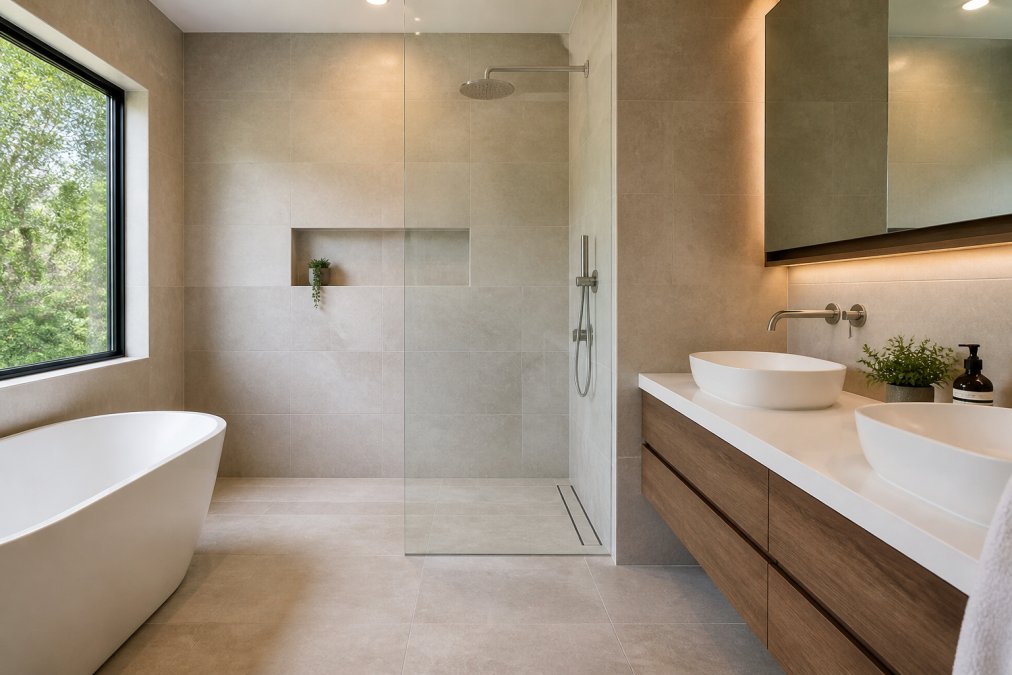
How a Wet Room Differs From a Standard Bathroom
A standard bathroom contains water. A wet room expects it. That single shift changes almost every build decision.
- The subfloor must be tanked across the full footprint, not just the shower zone
- The floor needs a continuous fall toward the drain, typically built into a level-access former or sloped screed
- Wall coverings need to be moisture-resistant from floor to ceiling in the wet zone
- Ventilation has to handle a much larger volume of airborne humidity
Wet Room Waterproofing Requirements: Tanking, Membranes, and Floor Gradients
Waterproofing is the part of a wet room nobody photographs and everybody regrets skipping. Tanking seals the floor and walls with a flexible membrane before any tile goes down, the single most important step in the build.
- Liquid-applied membranes. A polymer-modified cementitious or polyurethane coating rolled on in two or more coats. They conform to awkward shapes, corners, and drain details, with no seams to lap. The trade-off is cure time: each coat must dry before the next, adding a day or more to the schedule.
- Sheet membranes. A bonded waterproof sheet, usually polyethylene or rubberized, adhered with a compatible adhesive or thin-set. They are fast, consistent in thickness, and easy to inspect, but every seam and corner needs a pre-formed band or bonded overlap, and a single lifted edge is a leak path.
Substrate Prep Comes Before Any Membrane
A membrane is only as good as what it bonds to. Before tanking:
- The substrate must be clean, dry, and free of dust, grease, and loose material.
- Timber floors need a rigid overlay, typically cement backer board or minimum-thickness plywood, screwed down so sheets cannot move.
- Concrete slabs need cracks filled and high spots ground down so the former sits flat.
- The drain body and pipe penetrations are set and sealed first, because the membrane must tie into them, not around them.
The Gradient and the Drain
A floor waste sits at the low point, and the fall toward it should be continuous with no flat spots where water can sit. A common target is roughly 1:60 to 1:80 across the wet zone, shallow enough to walk on, steep enough to move water. Linear drains let the fall run in one direction, easier to build and tile than a four-way slope to a central waste.
The most common wet room failure we see is a membrane that was lapped the wrong way or skipped at the wall-floor junction. Water finds that gap, sits against the subfloor, and by the time you notice the smell, you’re looking at a full strip-out rather than a repair.
Flood Testing and Sign-Off
Before tile goes down, the tanked floor should be flood tested: plug the drain, fill the floor with a shallow layer of water, and leave it at least 24 hours. Any drop in level or damp patch below points to a breach that must be repaired before the finish goes on. It’s the cheapest insurance in the project.
Ventilation and Moisture Control
A wet room generates far more airborne moisture than a standard bathroom because there’s no enclosure to contain the steam. An extractor fan sized for the room volume, ducted to the outside rather than into a ceiling void, is not optional. Pair it with a humidity-sensing switch so it runs until the air is dry, not just for a fixed ten minutes.
Small Wet Room Layout Ideas for Cramped Spaces
Small wet room layout ideas work best when you stop treating the shower as a separate zone. In a tight footprint, the goal is one continuous floor with the drain placed to suit how you move through the room, not where it’s easiest to run the waste pipe.
A few layouts that hold up well:
- Linear drain along the back wall. The fall runs in one direction, easier to build and tile than a four-way slope.
- Walk-in shower at the far end. Put the wet zone furthest from the door so splash travels the longest path.
- Corner entry with a fixed screen. A single fixed glass panel controls splash better than a full enclosure and takes up less visual space.
- Wall-hung fixtures throughout. A wall-hung toilet and floating vanity keep the floor clear, making a small room read bigger and cleaning faster.
Glass Screens and Space-Saving Fixtures
A glass screen is the compromise between a fully open wet room and a traditional enclosure. A single fixed panel, roughly 700 to 900 millimetres wide, blocks the worst of the spray while keeping the open-concept feel. Specify 8 to 10 millimetre toughened glass with a water-spotting-resistant coating, because a wet room screen gets hit far more often than a standard shower door.
The Cost of Installing a Wet Room: What Actually Drives the Price
The cost of installing a wet room is driven less by the fixtures you can see and more by the waterproofing, drainage, and subfloor work you can’t. Two rooms of identical size can land at very different numbers depending on what’s underneath.
The variables that move a quote the most:
- Drainage routing. Moving a waste pipe, or adding a second one, means opening the floor and sometimes the ceiling below. A drain close to the existing stack is far cheaper than one that has to travel.
- Subfloor condition. Rot, deflection, or an uneven slab all add prep work before tanking. Joist reinforcement or a new overlay can add significant labor.
- Membrane system. A pre-formed former and sheet membrane costs more in materials but reduces labor and risk. A hand-built screed former is cheaper in materials and more expensive in skill and time.
- Tiling and materials. Large-format porcelain tiles need a flatter substrate and more careful cutting, and cost more per square foot than standard ceramic. Natural stone adds sealing and maintenance.
- Ventilation. Adding a ducted extractor where none exists is real work, especially if the duct runs through a ceiling void to an exterior wall.
- Glass and fixtures. A fixed panel is cheaper than a framed enclosure, and wall-hung fixtures cost more to install because the wall must be opened and blocked.
When you compare quotes, ask each contractor to break out the waterproofing, the former, and the drain as separate lines. If those items are buried in a single lump sum, you can’t tell whether the most failure-prone part of the build is being done properly or cheaply.
Structural and Subfloor Considerations Most Guides Skip
Most wet room guides skip the structure entirely, which is exactly where the expensive problems live. A wet room adds weight and water to a floor never designed to carry either.
Ask your contractor how they’re handling floor deflection before they quote the tiling. If the answer is vague, that’s the tell. A wet room built on a floor that moves will fail at the membrane, and no amount of quality tile will save it.
Underfloor Heating and Accessibility: Two Upgrades Worth Planning For
Underfloor heating and accessibility features are far cheaper to plan in at the start than to retrofit later. Both sit under the finished floor, so adding them afterwards means tearing up a waterproofed wet room.
DIY vs. Professional Installation: Where Wet Rooms Go Wrong
DIY wet rooms fail for predictable reasons, and almost all trace back to waterproofing. Tanking is unforgiving: a single pinhole, a membrane lapped the wrong direction, or a drain flange sealed with the wrong product will leak, and the leak won’t show until the damage is well underway.
Where a professional installation earns its cost:
- Correct membrane system specified for the substrate and the drain
- Gradient built into a pre-formed former rather than guessed at
- Drainage and ventilation sized for the actual room
- A clear point of accountability if something fails
The visible parts of a wet room, the tiles, the glass, the fixtures, are the easy decisions. The build lives or dies on the waterproofing, the gradient, and the subfloor, none of which you’ll see again once the room is finished.
Pros and Cons of a Wet Room Bathroom
A wet room bathroom is worth building when the waterproofing and drainage are done properly, and a costly mistake when they aren’t. Weigh the trade-offs before you commit.
Pros:
- More usable floor space, especially in a small room
- Level-access entry that suits all ages and mobility needs
- Fewer surfaces to clean, with no tray or enclosure to scrub
- A clean, open look that adds perceived space
Cons:
- Higher upfront cost than a standard shower install, driven by tanking and drainage
- Water and splash spread further, so the whole room needs moisture-resistant finishes
- Ventilation demands are higher
- Repairs are more disruptive because the waterproofing sits under the finished floor
Frequently Asked Questions
What are the downsides of having a wet room?
The main downsides are moisture management and cost. Because there is no tray or curb containing the water, the entire floor becomes a wet zone, so waterproofing, drainage, and ventilation all have to be done correctly. If the floor gradient is wrong or the tanking is poorly installed, water can seep under the tiles and cause damage. Wet rooms also cost more to install than a standard shower because of the tanking, membrane, and drainage work involved.
Can a toilet go in a wet room?
Yes, a toilet can be included in a wet room design, and many homeowners do this to save space in a small bathroom. The key is placement: keep the toilet far enough from the shower spray so it stays dry, or use a glass screen to separate the wet zone. Wall-hung toilets work well because they free up floor space and are easier to clean around. Your plumber will need to factor the toilet into the drainage and floor gradient plan.
How does a wet room differ from a traditional bathroom layout?
A traditional bathroom has a shower tray, tub, or enclosure that contains water in one spot. A wet room bathroom design makes the whole floor the shower area, with a slight slope toward a floor waste and no curb to step over. That means the entire room needs tanking and a waterproof membrane, not just the shower corner. The result is a more open, level-access space, but it demands more careful waterproofing and drainage work.
Can a wet room increase the resale value of a home?
A well-built wet room can add appeal, especially for buyers looking for accessible, level-access bathrooms or a spa-like primary suite. But the value depends on the quality of the waterproofing and finish. A wet room that leaks or shows moisture damage will hurt a sale. If it is installed correctly with proper tanking, ventilation, and slip-resistant flooring, it can be a strong selling feature in a competitive market.
