
Table of Contents
- Why Small Bathroom Layout Matters
- Small Bathroom Floor Plans: Start With Measurements
- Bathroom Layout Dimensions: Critical Clearances and Spacing
- Fixture Placement: Optimizing Your Layout
- Small Bathroom Shower Ideas: Choosing the Right Type
- Small Bathroom Storage Ideas: Maximizing Vertical Space
- Visual Tricks to Make Your Small Bathroom Feel Bigger
- Planning Your Renovation: What to Know Before You Start
- Frequently Asked Questions
Last Updated: October 12, 2026
Why Small Bathroom Layout Matters
A well-designed small bathroom layout transforms a cramped space into a functional, comfortable room. Poor planning leads to awkward fixture placement, wasted floor space, and daily frustration.
Think about your morning routine: door to sink, sink to toilet, toilet to shower. Poorly positioned fixtures mean constant bumping and squeezing. A smart small bathroom layout eliminates these problems.
At Bathroom Renovators, we’ve designed many small bathrooms across the region. The difference between cramped and open comes down to thoughtful planning before any work begins.
Measure twice, plan once. Most bathroom renovation mistakes happen because homeowners skip the measurement step. Spending an hour with a tape measure saves weeks of frustration later.
Small Bathroom Floor Plans: Start With Measurements
Your floor plan is the foundation: it shows where fixtures go, how doors swing, and whether plumbing will cooperate. You can’t design a functional small bathroom layout without understanding your existing space.
Common floor plan configurations
Small bathrooms typically fall into three shapes: rectangular, square, or L-shaped.
Rectangular layouts are the most common: toilet at one end, vanity along the long wall, shower at the other. This creates clear traffic flow from door to fixtures.
Square layouts are trickier, with less wall space for fixtures. Corner solutions and wall-mounted options become essential.
L-shaped layouts give you flexibility: tuck the toilet into one corner and run the vanity along the longer wall. This often feels more open because fixtures aren’t lined up in a row.
Measuring for your renovation
Start with the overall dimensions: length and width in centimeters. Then measure from the door to each wall, wall heights, and window locations.
Next, mark where existing plumbing exits the wall. Toilet, sink, and shower drains are expensive to move, so knowing their location helps you design around them.
Measure the door swing: open it fully and note how much floor space it takes up. A door that swings inward steals usable floor space and limits fixture placement.
Write everything down, take photos, and sketch a rough floor plan. This becomes your design guide.
The most common mistake is guessing at measurements. A small error in your floor plan creates big problems during installation. Measure everything, even if it feels tedious.
Bathroom Layout Dimensions: Critical Clearances and Spacing
Building codes and basic ergonomics require minimum clearances around fixtures. These aren’t suggestions, they’re the difference between a usable bathroom and one that feels cramped.
Door swing and entry space
Your bathroom door needs clearance to open fully. You need at least 81 cm of clear width to pass through comfortably; 61 cm is the accessibility minimum.
An inward-swinging door takes up space inside the bathroom; an outward-swinging door frees up floor space. Check whether your hallway has room before committing.
If space is extremely tight, a pocket or sliding door eliminates the swing problem entirely, recovering several square feet of usable floor space.
Fixture-to-fixture spacing
The toilet needs at least 38 cm of clearance from its center line to any wall or adjacent fixture; 45 cm feels more comfortable and prevents a cramped feeling.
The vanity should sit at least 53 cm from the toilet to keep knees clear of the cabinet; 61 cm is better in a small bathroom.
The shower or tub needs space to step in and out safely. A shower stall should be at least 81 by 81 cm; a corner shower can be slightly smaller, but anything under 76 cm feels cramped.
Undersizing fixtures to save space creates a bathroom that feels worse, not better. A 71 cm-wide shower might fit on paper, but it’s miserable to use. Stick to minimum clearances, and your bathroom will feel functional.
Fixture Placement: Optimizing Your Layout
Where you position each fixture determines whether your small bathroom layout works or fails. Smart placement creates flow and makes the space feel larger.
Toilet positioning
The toilet is usually the easiest fixture to move, so it often goes where others can’t fit. Avoid placing it directly across from the door, which creates an awkward sight line.
Positioning the toilet in a corner or against a wall creates privacy. In an L-shaped layout, tuck it into the short leg to keep it out of the main traffic flow.
Keep the toilet away from the vanity: at least 45 cm of separation prevents a cramped feeling, 38 cm is the absolute minimum, and 61 cm is ideal.
Vanity and sink placement
The vanity takes up the most wall space. Position it where you have the most natural light, typically near a window, since lighting is critical for grooming.
A wall-mounted vanity frees up floor space and makes the bathroom feel larger. Pedestal sinks are more space-efficient but offer no storage, so a wall-mounted vanity with a compact footprint is usually the best compromise.
Keep the vanity at least 53 cm from the toilet to ensure room to move between fixtures.
Small Bathroom Shower Ideas: Choosing the Right Type
The shower is often the largest fixture in a small bathroom. Your choice here affects the entire layout and how the space functions.
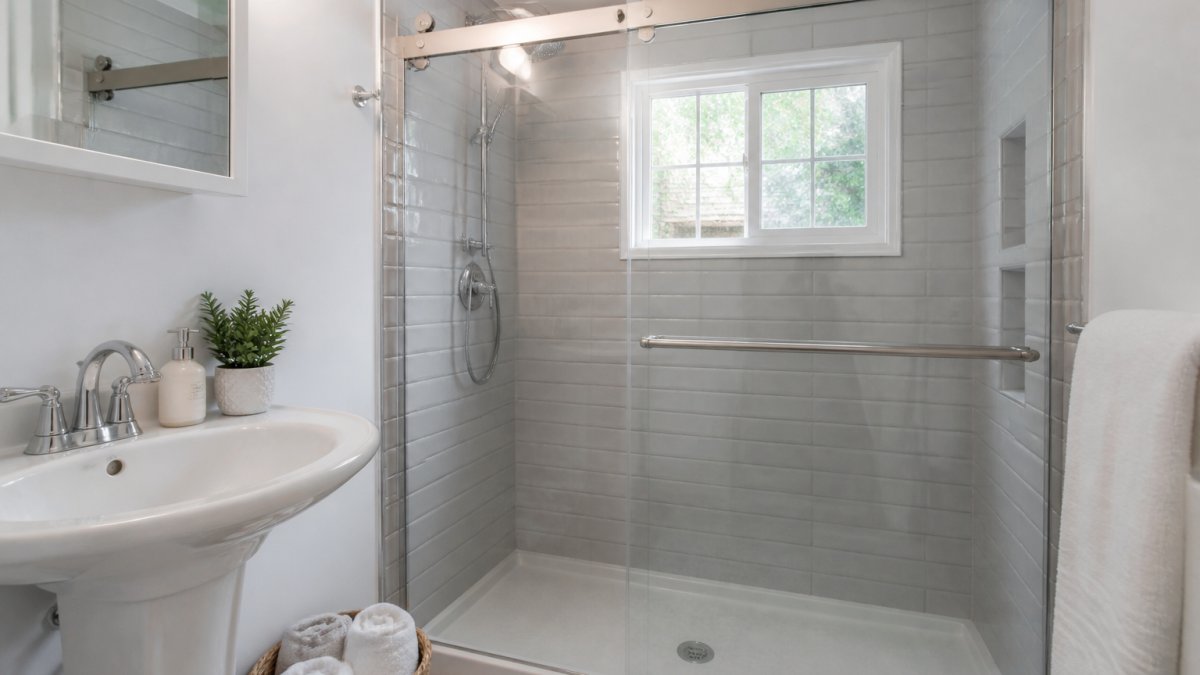
Shower enclosure options
A corner shower stall is the most space-efficient option, using two walls and freeing the third for other fixtures.
Frameless glass enclosures make a shower feel more open than framed versions, since the glass creates no visual barrier. This effect is significant in small spaces.
Sliding shower doors take up less space than hinged doors, which swing into the bathroom and consume floor space.
A shower-tub combo saves space, but the tub portion is often too small for bathing. If you rarely take baths, a shower-only stall is usually better for a small bathroom layout.
Wet room layouts
A wet room is a fully waterproofed bathroom where the shower isn’t separated by a door or enclosure, so water drains from anywhere. This maximizes usable floor space.
Wet rooms work best with good ventilation. The entire bathroom must be sealed and properly ventilated, or mold and mildew will develop. This adds cost but creates a genuinely open-feeling space.
Wet room layouts work best for single-person households or couples who don’t mind sharing a highly open bathroom. Families with children may find the lack of containment frustrating.
Small Bathroom Storage Ideas: Maximizing Vertical Space
Storage is always tight in a small bathroom. The solution is thinking vertically instead of horizontally. Wall space is your greatest asset.
Wall-mounted cabinets and shelving
Floating shelves above the toilet create storage without taking up floor space. Install them 30 to 45 cm above the tank for easy reach.
A tall, narrow cabinet beside the vanity uses vertical wall space efficiently. Typically 30 to 45 cm wide and nearly floor-to-ceiling, it holds surprisingly much.
Corner cabinets capture otherwise wasted corner space above the toilet or beside the vanity.
Wall-mounted shelving around the shower creates storage without consuming floor space. Keep shelves 30 to 45 cm above the shower area to prevent water damage.
Compact vanity solutions
A vanity with a narrow footprint, 61 cm or less, fits tight spaces. Wall-mounted vanities are the most space-efficient because they don’t sit on the floor, creating the illusion of more space.
A corner vanity uses two walls and is space-efficient, though it can feel cramped.
Vanities with built-in storage maximize functionality. Drawers and cabinets below the sink keep supplies organized and out of sight. In a small bathroom, every piece of furniture should serve multiple purposes.
Visual Tricks to Make Your Small Bathroom Feel Bigger
A small bathroom layout can feel spacious with the right design choices. Lighting, color, and finishes create the perception of space.
Lighting and mirrors
Mirrors are the most powerful tool for making a small bathroom feel larger, reflecting light and creating depth. A large mirror behind the vanity is essential; extend it to the ceiling for maximum impact.
Bright lighting is critical, since dark bathrooms feel cramped. Install lights above the mirror, beside it, and overhead for a bright, open feeling.
Natural light is best if your bathroom has a window. Keep it uncovered or use sheer curtains so the small space feels connected to the outside.
Color, tiles, and finishes
Light colors make a small bathroom feel larger: white, light gray, and pale blue create an airy feeling, while dark colors absorb light and shrink the space.
Large tiles visually expand a small space. A 30-by-30 cm tile creates fewer grout lines than smaller tiles, so fewer visual interruptions make the space feel more open.
Glossy tiles and fixtures reflect light and brighten the space, while a mix of matte and glossy finishes adds visual interest without overwhelming a small area.
Wallpaper can add personality, but busy patterns make a small space feel cramped. Choose subtle patterns or solid colors, and limit pattern to a single accent wall.
Avoid dark grout in a small bathroom. Light-colored grout makes tiles blend together visually, expanding the sense of space. Dark grout creates lines that chop up the walls.
Planning Your Renovation: What to Know Before You Start
A successful small bathroom renovation requires understanding your constraints. Plumbing, ventilation, and accessibility considerations affect your layout options.
Plumbing and ventilation constraints
Moving plumbing is expensive and complicated. Before finalizing your small bathroom layout, understand where existing drains and water lines are located; keeping fixtures near existing plumbing saves thousands of dollars.
Ventilation is critical in a small, enclosed bathroom. Without proper airflow, moisture builds up and creates mold and mildew. An exhaust fan that vents outside (not into the attic) is essential, running at least 20 minutes after showers.
Building codes require specific ventilation capacity based on bathroom size. A bathroom under 9.3 square meters typically needs a 50-80 CFM (cubic feet per minute) fan. Larger bathrooms need more powerful ventilation. Check local requirements before finalizing your design.
Accessibility considerations
If anyone in your household has mobility challenges or is aging in place, accessibility features become important.
A curbless shower (a wet room or low-threshold shower) is easier to enter for people with mobility issues.
A comfort-height toilet (43 to 48 cm) is easier to use than a standard toilet (36 to 38 cm).
A vanity with a knee space underneath allows someone in a wheelchair to use the sink.
Planning for accessibility during your initial design phase is much cheaper than retrofitting later.
A small bathroom layout doesn’t have to feel cramped or awkward. The key is planning before you start work.
Frequently Asked Questions
How do you plan a layout for a small bathroom?
Start by measuring your space precisely, including door swing, fixture positions, and clearance zones. Sketch your floor plan with all fixtures marked. Prioritize traffic flow: ensure the toilet isn’t visible from the door, position the sink for easy access, and leave at least 60 cm of walking space. Work with a professional to verify plumbing locations and identify any structural constraints before finalizing your small bathroom layout.
What is the best small bathroom shower idea for tight spaces?
Sliding shower doors or frameless shower screens save space compared to swing doors. For very compact bathrooms, a wet room design (floor-level shower without a tub) maximizes usable floor area. Corner shower enclosures also work well. Avoid large corner tubs unless you have the footprint; a walk-in shower with a pivot door or sliding enclosure is typically the most functional choice for small bathroom shower ideas.
How much space should you leave between bathroom fixtures?
The toilet should sit at least 45 cm from the nearest fixture or wall. Allow 60 cm minimum for standing room in front of the sink and toilet. The vanity typically needs 60-75 cm of clearance in front. Door swing requires 60 cm of clear space. These bathroom layout dimensions ensure safe, comfortable movement and meet functional standards for accessibility and cleaning access.
Can a small bathroom have a walk-in shower without feeling cramped?
Yes, if your floor plan allows. A walk-in shower with a sliding door or frameless enclosure creates visual openness. Use light-colored tiles, large-format tiles, and bright lighting to enhance the sense of space. Avoid heavy shower curtains. Position the shower to maximize the remaining floor area for movement. A professional designer can confirm whether your specific small bathroom layout can accommodate a walk-in shower without sacrificing function.
